Anki: Proper Deck Organization

Editor Note
At time of writing, the latest version of Anki is 2.1.57. This is the version used for all screenshots.
Anki allows users to easily download decks others have made, known as Shared Decks. New users often see this, and get overly enthusiastic, downloading a huge number of shared decks.
Having a large variety of learning material is great, but importing them all can cause a mess. In earlier versions of Anki, if you had too many decks in your collection, you may have seen this warning:
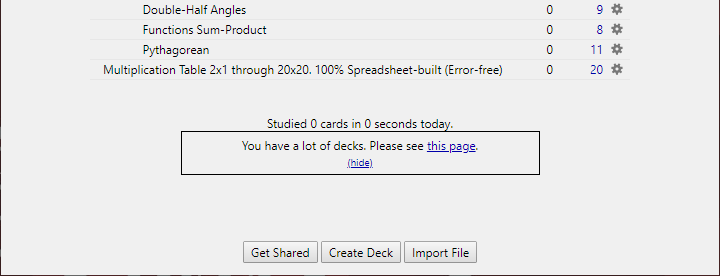
Although this warning is no longer displayed in current versions of Anki, it’s still important to properly organize your Anki decks.
In this post, I’ll show how to group your many many decks, into a few broad subjects, such as Japanese, Math, and History. We’ll do so in a way that retains the ability to study specific topics, like Japanese Grammar, Multiplication, and American History post WW2.
Importing Anki Decks
If starting from scratch, you can either start creating your own decks, or download shared decks.
If getting shared decks,
click Get Shared to navigate to the Anki Shared Deck web page.
From here, choose a deck you’d like to download.
After downloading the .apkg file,
click Import File at the bottom of the Anki desktop program,
to add the new decks to your collection.
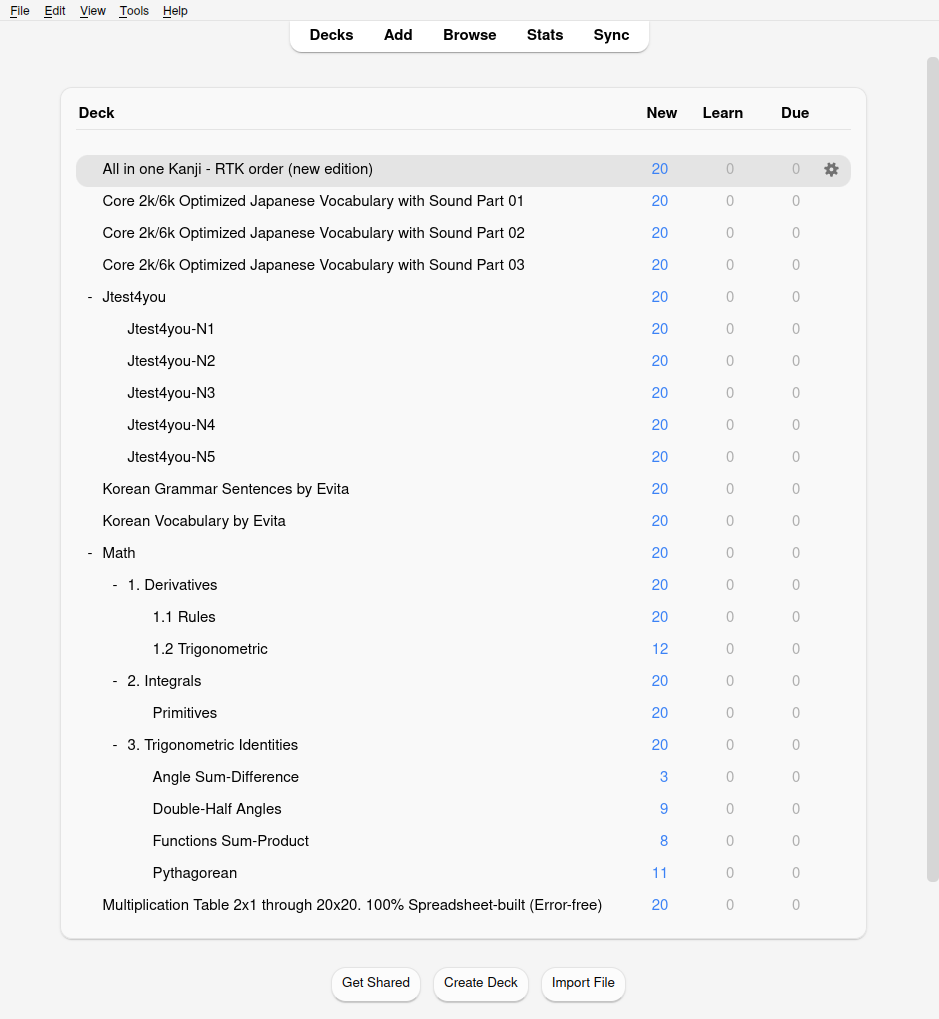
For this example, I’ll be using a three part Japanese Core2k/6k deck, as well as separate Kanji and Grammar decks. I’ve also downloaded Korean Grammar and Vocabulary decks, as well as two Math decks to add some variety.
The specific shared decks (and associated subdecks) I’m using are:
- All in one Kanji - RTK order (new edition)
- Core 2k/6k Optimized Japanese Vocabulary with Sound Part 01
- Core 2k/6k Optimized Japanese Vocabulary with Sound Part 02
- Core 2k/6k Optimized Japanese Vocabulary with Sound Part 03
- Jtest4you
- Jtest4you-N1
- Jtest4you-N2
- Jtest4you-N3
- Jtest4you-N4
- Jtest4you-N5
- Korean Grammar Sentences by Evita
- Korean Vocabulary by Evita
- Math
-
- Derivatives
- 1.1 Rules
- 1.2 Trigonometric
- Derivatives
-
- Integrals
- Primitives
- Integrals
-
-
- Trigonometric Identities
- Angle Sum-Difference
- Double-Half Angles
- Functions Sum-Product
- Pythagorean
- Trigonometric Identities
- Multiplication Table 2x1 through 20x20. 100% Spreadsheet-built (Error-free)
Setting Tags
Tags are like keywords used to organize your cards. It makes grouping and searching cards easier.
One benefit of tags over many decks and subdecks, is that cards can only belong to one deck, but can have many different tags. This allows grouping cards such as all Japanese cards, or all vocabulary cards in any language.
Because we’ll be merging decks together later, make sure to set up your tags while the decks are still separate. Some Anki shared decks come with a few tags already. Mine came with quite a lot. Look at whats already included, and add any additional tags you think you may need.
To do this,
click Browse from the top menu.
This will open the Anki card browser,
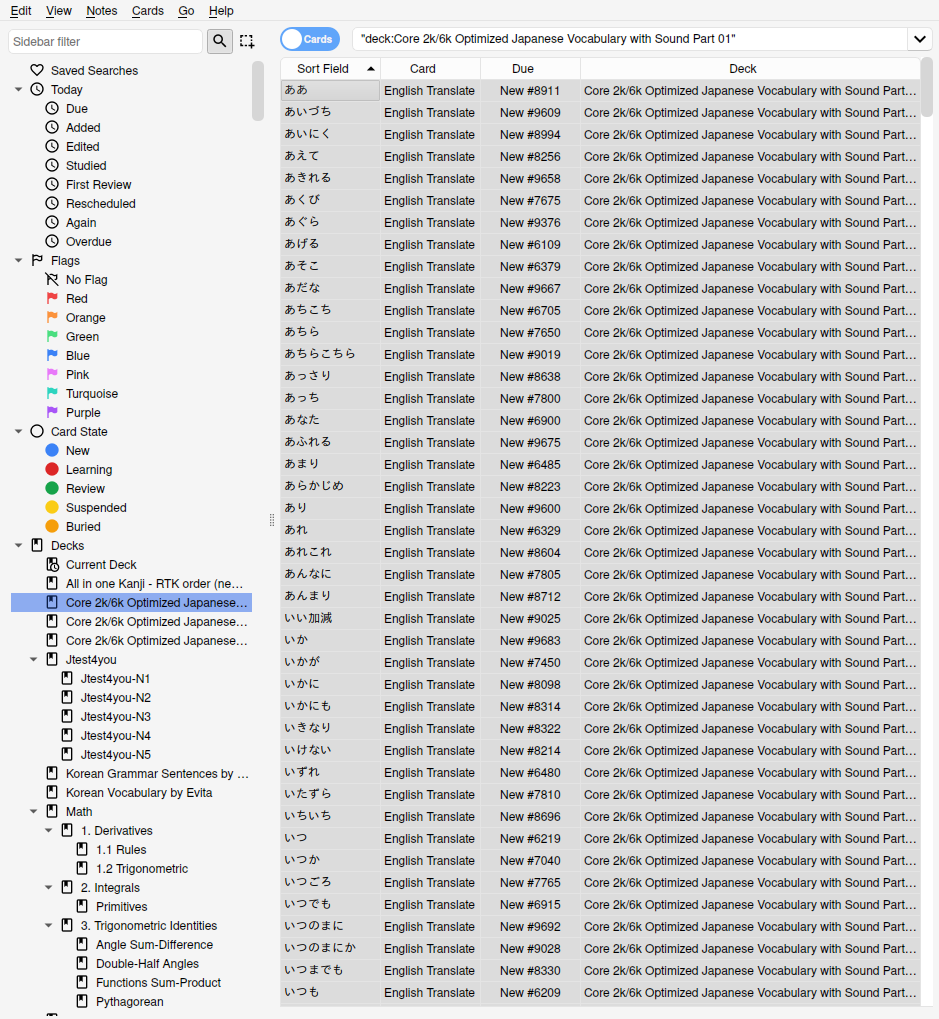
which looks like this:
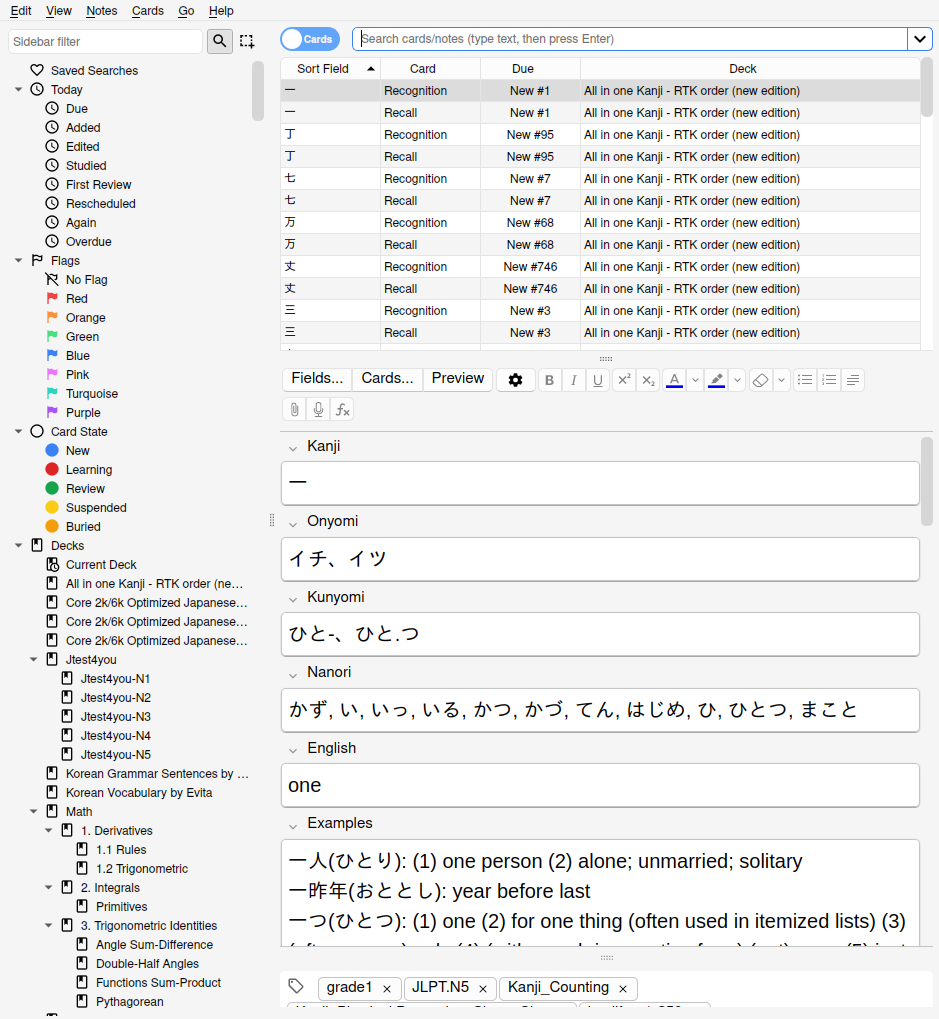
On the left sidebar,
you’ll see a list of your decks,
their note types,
and any tags that are already assigned.
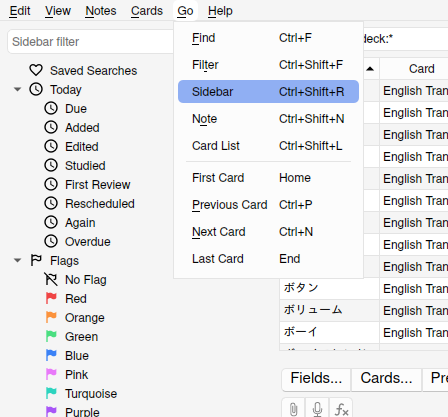
If you don’t see this menu,
click Go > Sidebar
from the top menu.
From the sidebar,
select one of the decks you just added.
Next click Edit > Select All.
This will highlight all cards in the deck.
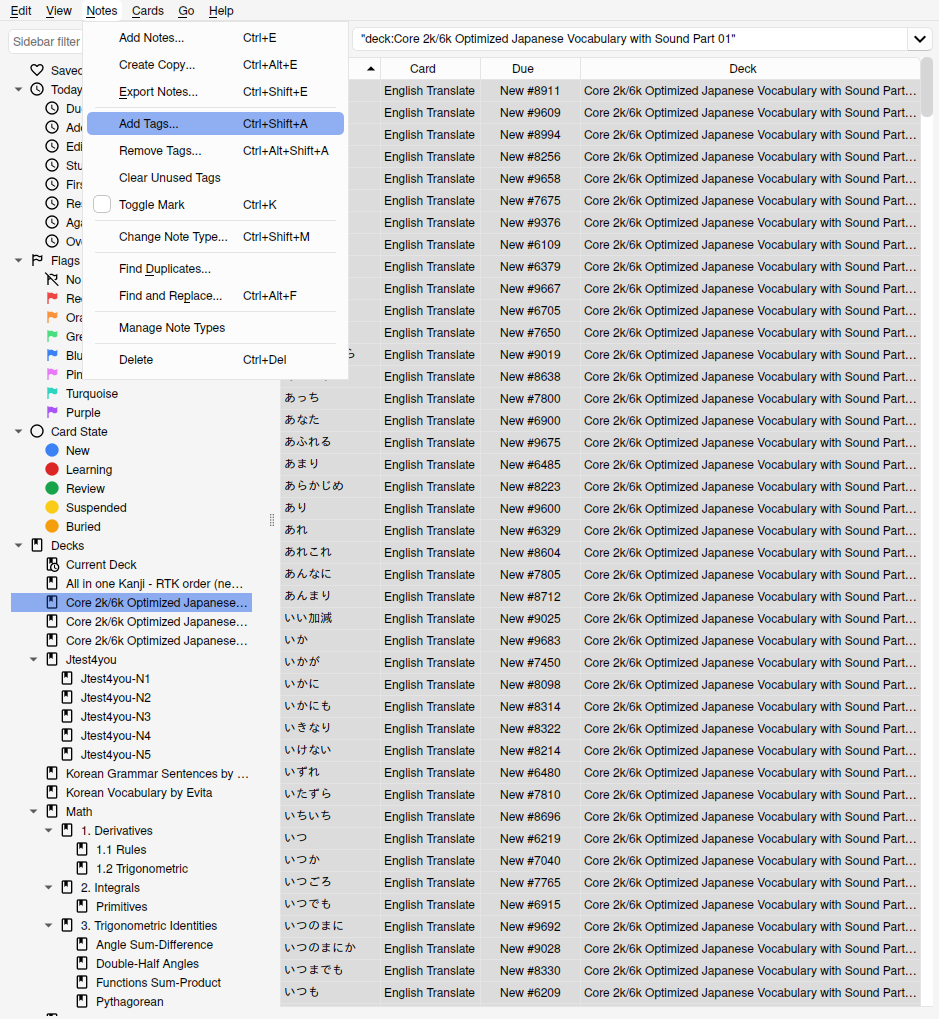
With all cards in that deck selected,
click Notes > Add Tags.
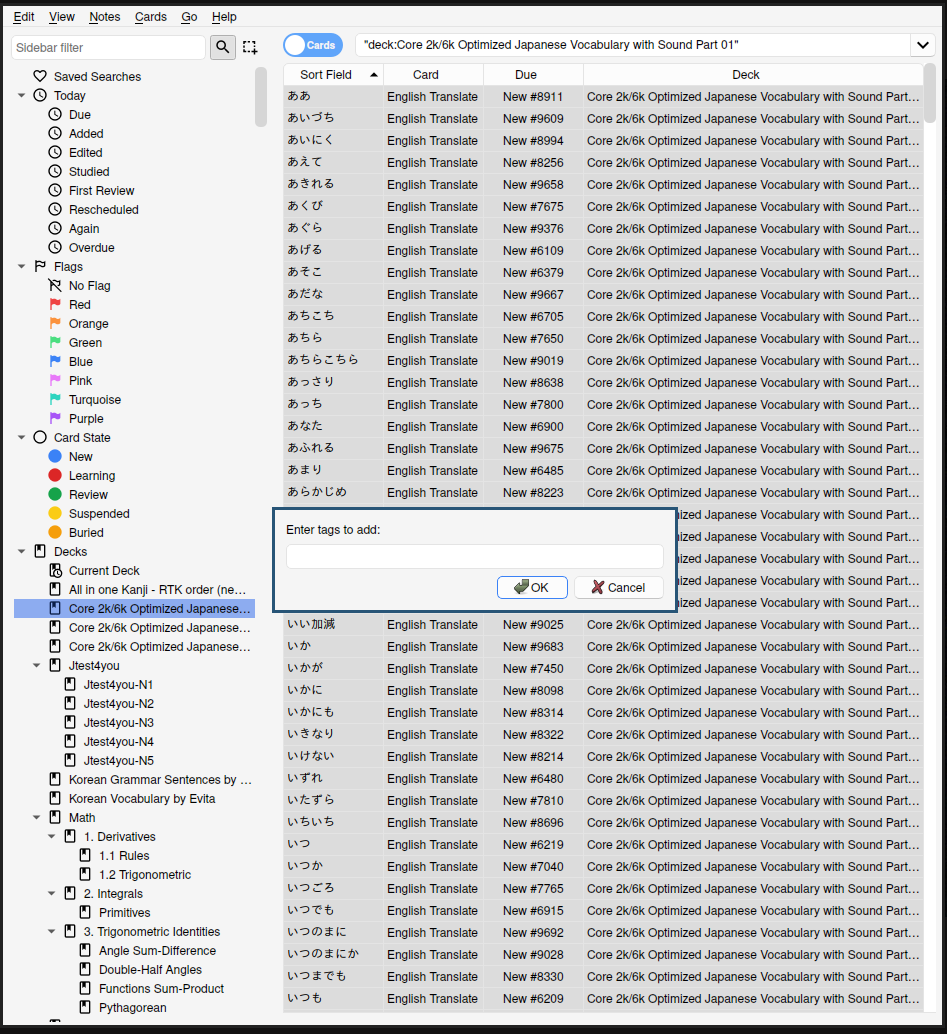
Use this prompt to add relevant and specific tags to the current deck.
The first deck I’m fixing
is Japanese Core2k/6k Part 01,
so I’m adding japanese vocabulary core2k_6k core2k_6k_pt01.
You should use tags that make sense for your deck.

These tags should be space separated, not comma separated.
If you add commas,
the comma will become part of the tag,
such as japanese, vocabulary,, etc…
If you need a multi-word tag,
such as core2k_6k,
make sure to separate it using a symbol such as ., _, or -,
rather than a space.
If I had used a space to separate it,
the tag would broken up into the separate tags
core2k and 6k.
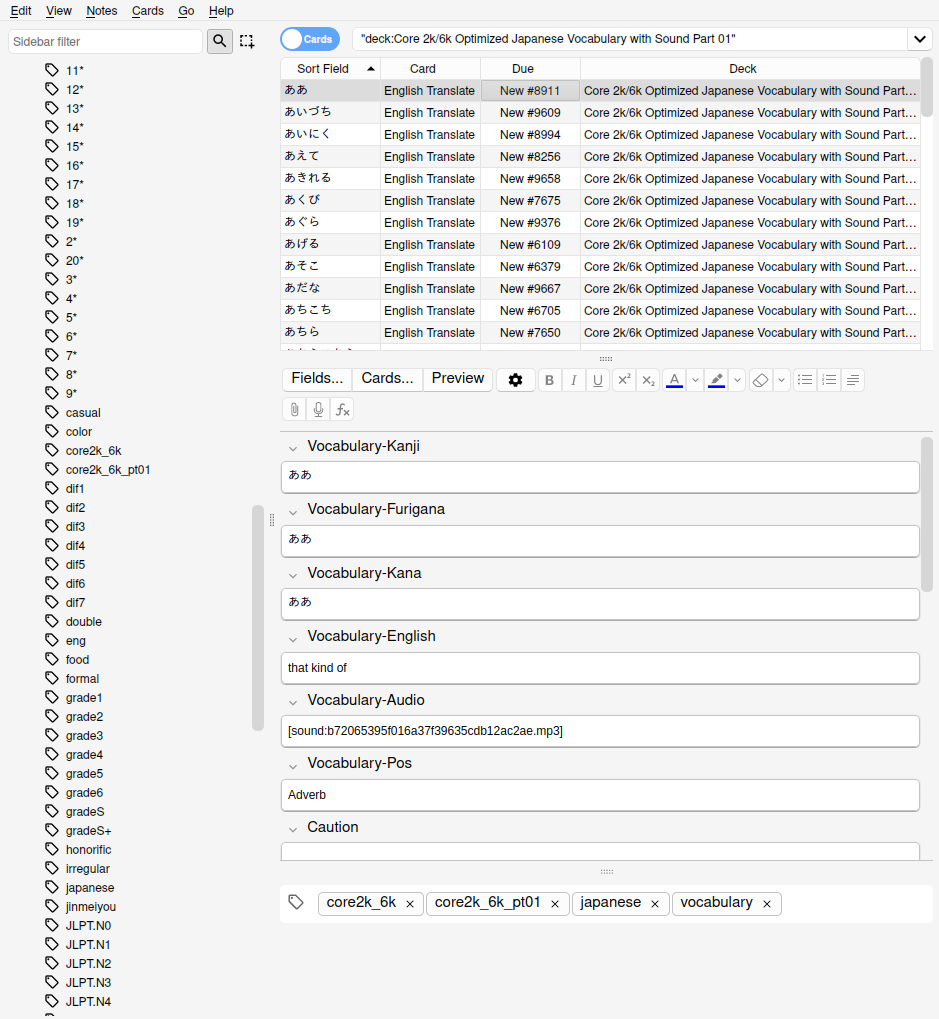
After clicking okay,
the tags are listed alphabetically as selectors in the left pane,
as well as being listed on the bottom of each card
in the Tags field.
Afterwards,
I selected the Part 02 deck,
and added the tags japanese vocabulary core2k_6k core2k_6k_pt02.
Notice the change to core2k_6k_pt02.
Once the decks are merged,
this will allow the parts to still be distinguished.
This isn’t really necessary,
since the parts are meant to be studied as a whole,
but if for whatever reason I need to split the decks later,
it will be a heck of a lot easier with a separate tag.
Afterwards double check the tags.
If you messed them up,
reselect the cards,
and go to Notes >> Delete Tags.
Here you can either delete individual tags
or all of them.
I’m going to go ahead and add tags to the rest of my decks. Here are some examples of additional tags I added to a few of the decks.
| Deck | Tags |
|---|---|
| All in one Kanji - RTK order (new edition) | japanese kanji AiO_Kanji |
| Core 2k/6k Optimized Japanese Vocabulary with Sound Part XX | japanese vocabulary core2k_6k core2k_6k_ptXX |
| Jtest4you » N3 | japanese Jtest4you grammar JLPT.N3 |
| Korean Vocabulary by Evita | korean vocabulary evita |
| Korean Grammar by Evita | korean grammar evita |
| Math » 1. Derivatives » 1.2 Trigonometric | math derivatives trig |
| Multiplication Table 2x1 through 20x20. 100% Spreadsheet-built (Error-free)” | math multiplication |
I like to add the subject (Japanese/Korean/Math), topic (Vocabulary/Grammar/Trig), and name of the original deck. If the author chose to split the deck into subdecks, I’ll add the subdecks as tags too.
Deck Consolidation
Now that proper tags are set,
we get to rename and merge the decks.
Hold Shift in the sidebar,
and select all the decks you are going to merge.
I’m creating a new Japanese deck,
so I selected all decks with Japanese-related content.
Once again go to Edit > Select All.
Scroll through the card browser
to ensure you’ve selected all the correct cards.
I wouldn’t expect to see any Korean or Math cards.
Next, select Cards > Change Deck > Add.
Type an appropriate name for the new deck and hit OK.
For my first deck,
I’m naming it Japanese.
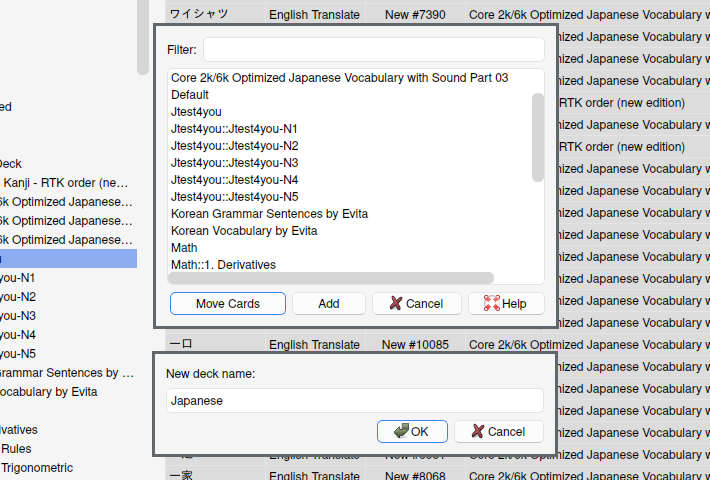
All your cards should now be in the new deck, with no cards in any of the old decks. You may want to click through each of the old decks and confirm they don’t contain any cards.
If you missed some cards,
click the remaining associated decks,
and again select Cards > Change Decks.
This time select the newly created deck from the list,
and instead of clicking Add, select Move Cards.
In this way,
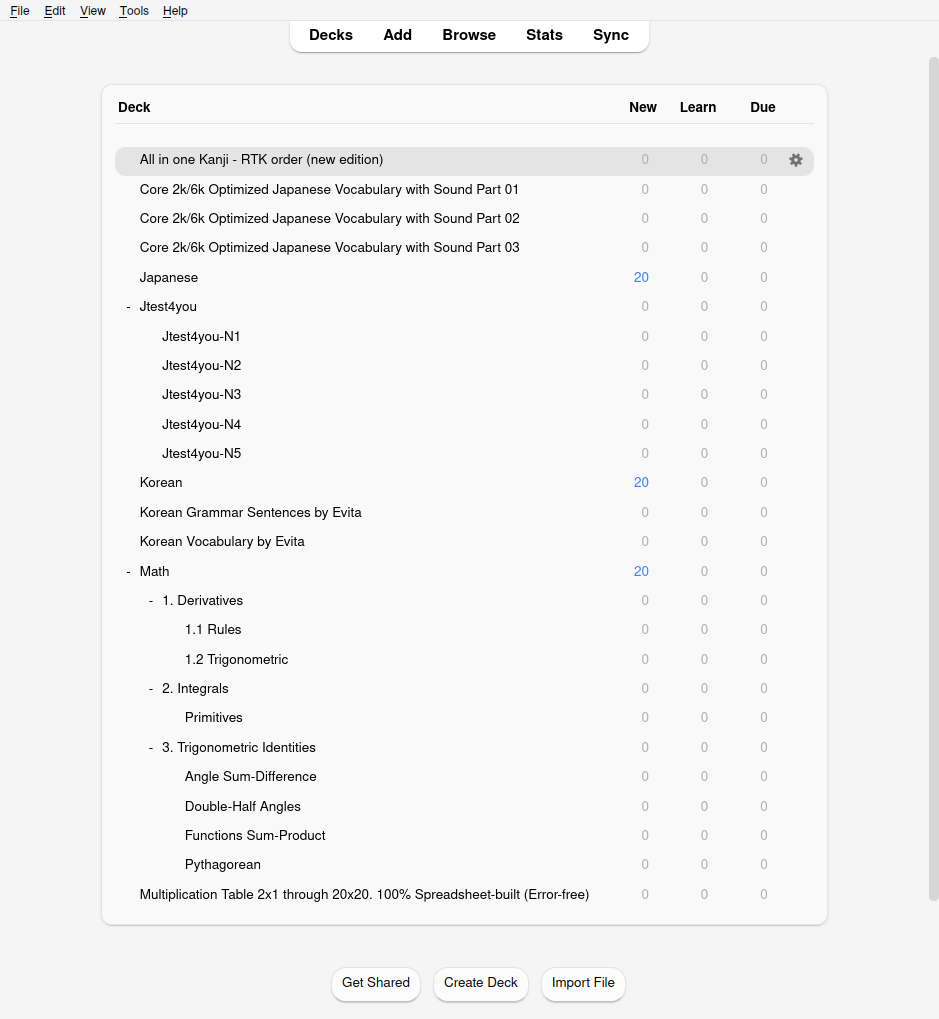
I’ve gone ahead and finished making the Japanese, Korean, and Math decks.
Cleanup
Back on the deck menu, the new decks should be available, but the old decks are also still there.
The final thing to do is to delete the old and empty decks. There are two ways to accomplish this:
- In the deck menu,
select the gear symbol to the right of each deck,
and select
Delete. - From the card browser:
- Select the deck in the sidebar and press the delete button on your keyboard or
- Right click on the deck and select
Delete
Take note of the lower left corner of the window, and make sure it says 0 cards deleted.
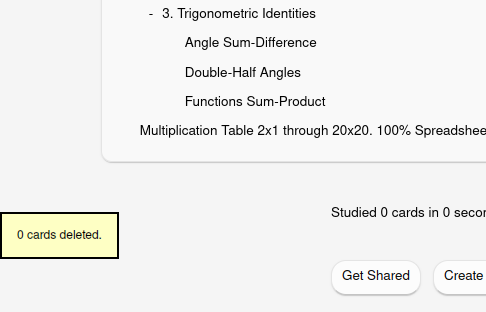
If it did delete cards, undo the change.
Afterwards, we’ll have a nice clean list of decks, and no deck count warning.
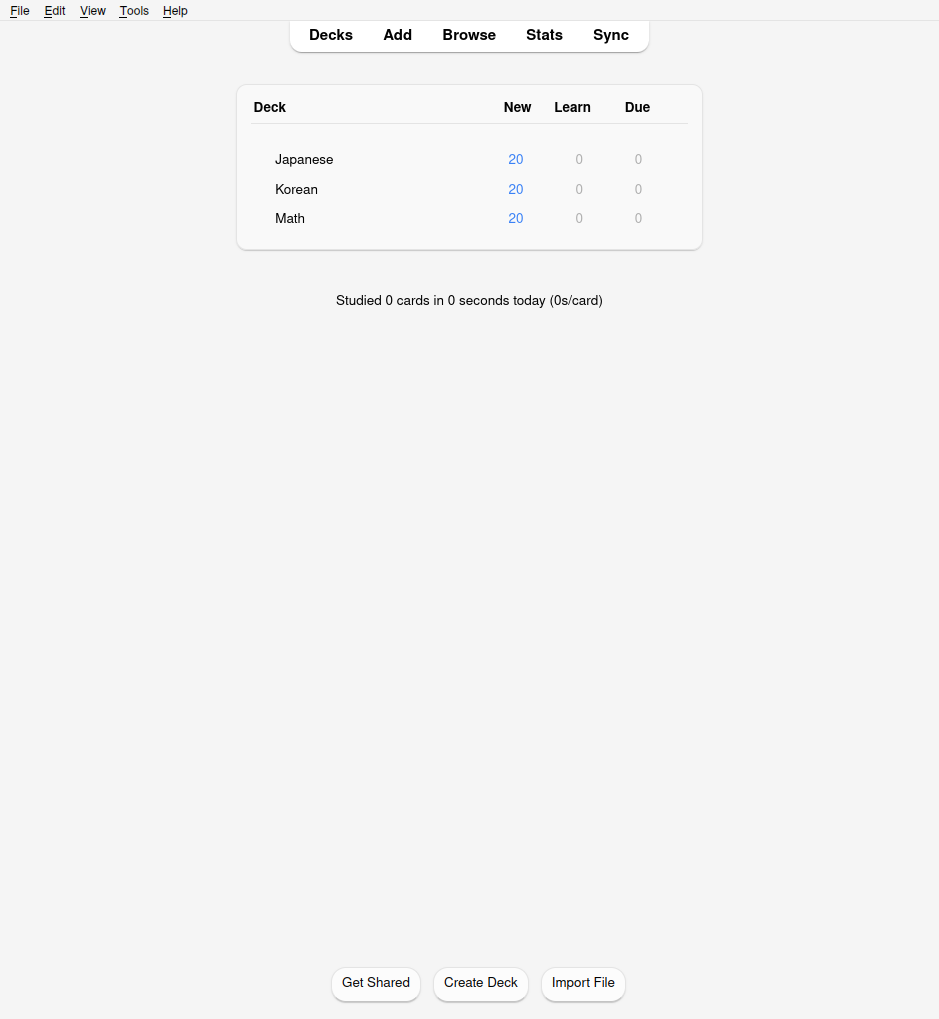
Now, when adding additional decks, make sure to merge into these new broad subject decks.
Filtering
So what if you only want to study grammar, and not vocabulary? Maybe you want to stick to part 2 of the Core deck, and skip part 1. Perhaps you want to study both Japanese and Korean vocabulary, but only cards with a certain difficulty, added within the last 2 weeks, while the moon is high in the night sky.
That’s where filtering comes into place. Filtering allows us to study only a portion of the larger common deck. Honestly, Anki filtering can be an entire article on its own, but I’ll give the basics here.
Head back into the card browser.
The list in the sidebar can be used to filter your decks. Pressing an item will cause the browser to only show cards that match that criteria.
Note the Filter button next to the search bar.
Clicking it shows the same selectors as the sidebar,
with a few extra.
Play around with the different options,
noticing how the search bar changes.

Multiple search terms can be combined with
the words and or or.
If neither is supplied, and is assumed.
Advanced logic can be achieved using parenthesis such as:
( A and B) or C
Once you’re done, copy the query that appears in the search bar.
I’ll be using this query I built, which makes a list of Trigonometry and Japanese grammar cards, which is totally normal…

Exit back to the deck browser and select Tools > Create Filtered Deck.
Paste the search query you made into the box labeled Search.

Make sure cards are selected by Order due,
and Reschedule cards based on my answers in this deck is checked.
After hitting build, your filtered deck will appear with the others. From here, the gear symbol allows renaming and deleting of the filtered deck. Deleting the filtered deck will not delete any cards that are within it. They will still be available from their main decks.

You can review the filtered deck just like your others, and progress will be merged back into the main decks.
 After reviewing all the cards in the filtered deck,
the
 Rebuild button can be used to repopulate the deck,
based off the provided query.
The Empty button removes cards from the filtered deck,
though they’ll still be available in the main deck.
The Options menu allows you to rebuild the query,
as well as change the other initial options.
And that’s it. This technique will help de-clutter your decks, and bring some much needed sanity back to your study. Hopefully I helped demystify one of the more confusing parts of Anki.