Blender VR: 3D Modeling and Sculpting With Oculus Meta Quest and Free Software
Editor Note
A note on brand names: Facebook's parent company changed their name to Meta, and purchased Oculus, the creators of the Quest VR headset. So Oculus/Meta are effectively the same thing, and you'll see the two names used interchangeably all over the internet.
- Introduction
- Part 1 - Oculus Setup
- Part 2 - See your Blender World in VR
- Part 3 - Enable usable Blender Window in VR space
- Part 4 - Mirroring (Optional)
- Conclusion
Introduction
VR is an exciting space that all different industries are trying to get into. If you’ve got a VR headset why not use it to explore your creations, or better still, to work on them inside the virtual world itself. In this post we do just that.
The problem is, there aren’t many roads to modeling while working in VR. Blender’s official plugin only allows inspection of your scene, not modification of it. Free plugins that allow VR modeling, such as Blender XR and the Maurui plugin have been discontinued. And almost everything includes a fee to use their plugin or service. That’s why we were excited to find a free method for modeling and sculpting in Blender VR.
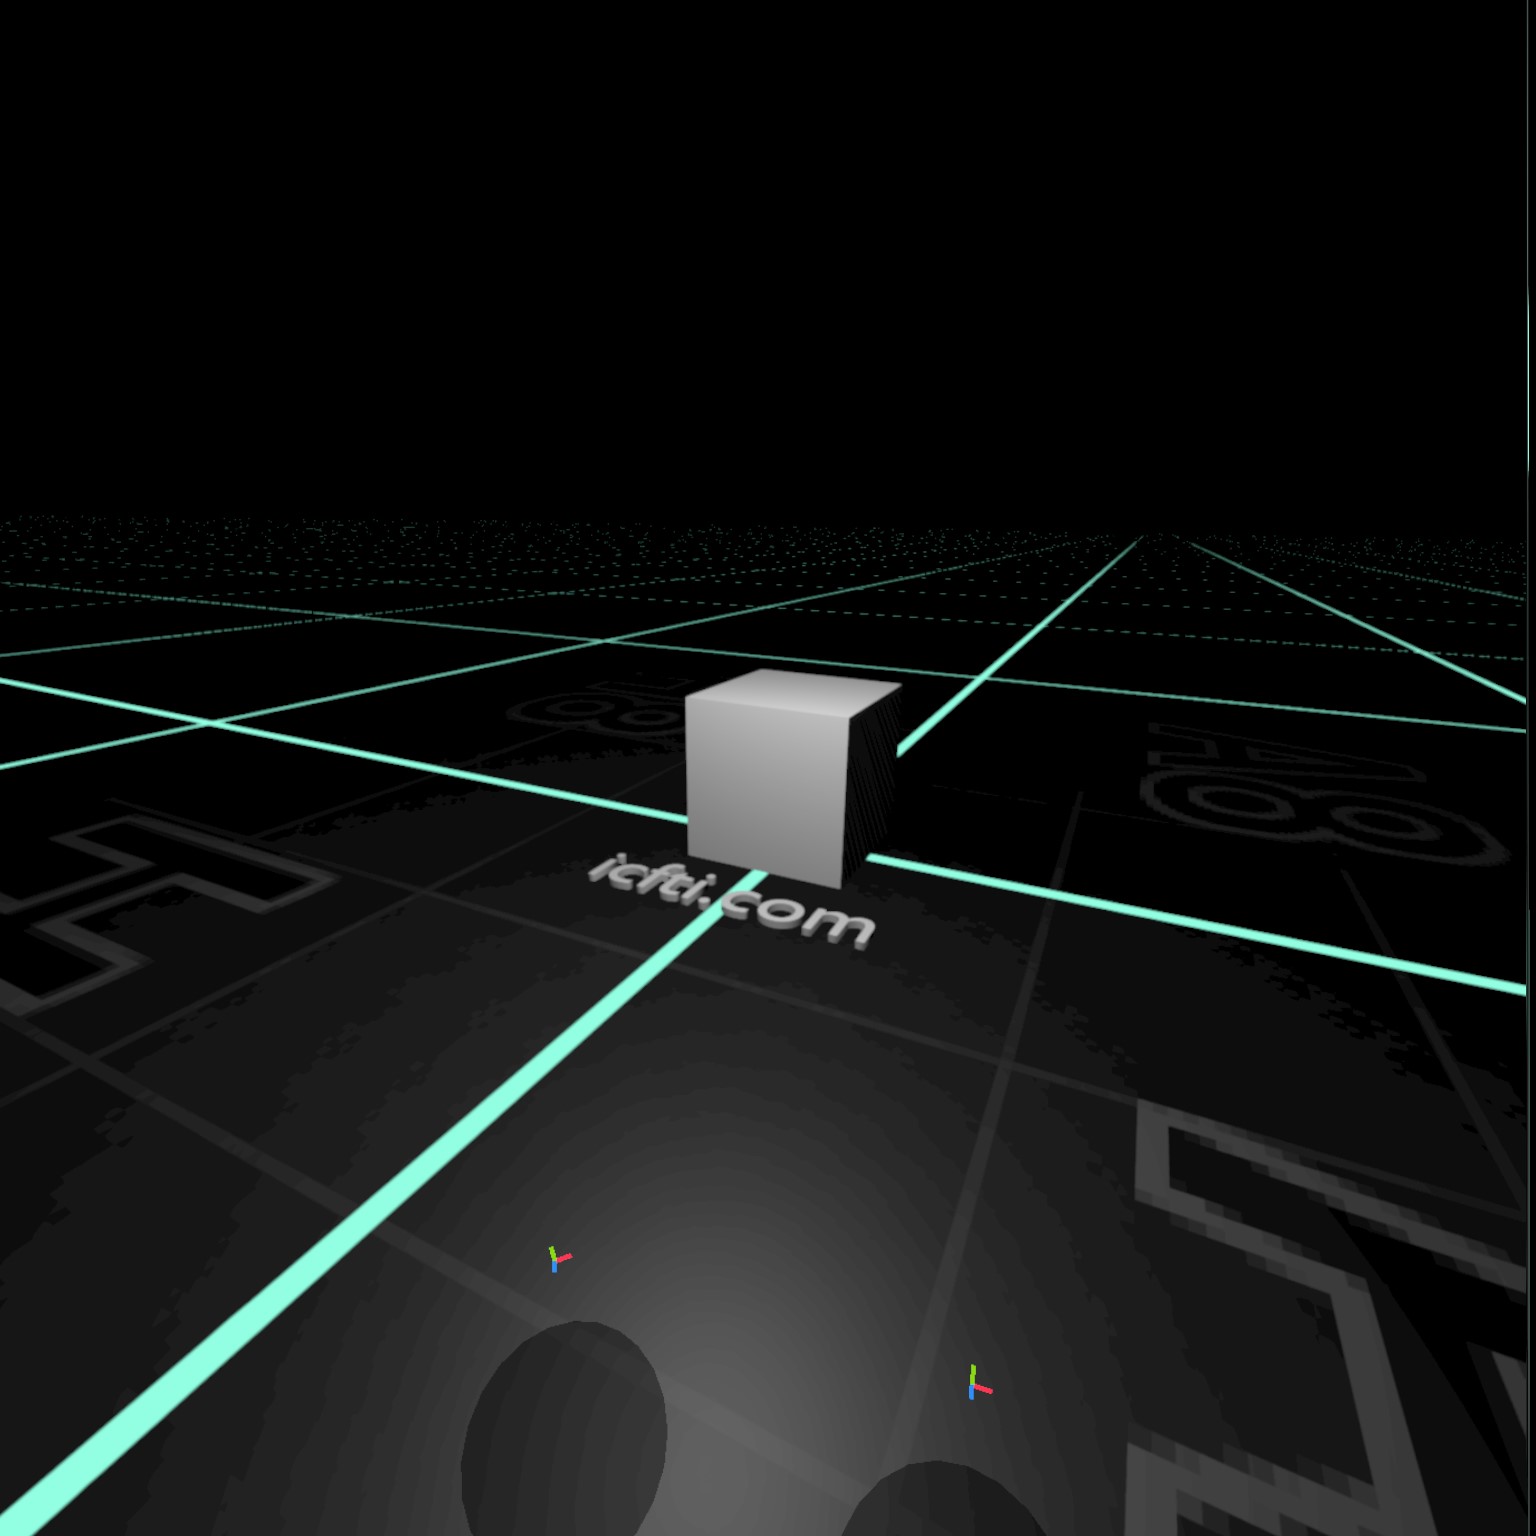
For this example, we’re going to use a Meta Quest 2. I simply added some shameless branding to the Blender default cube scene, as well as a tech-looking floor. I also changed the world shader to an ominous black material.
Part 1 - Oculus Setup
- Download and install the Oculus Rift/Oculus Link software
-
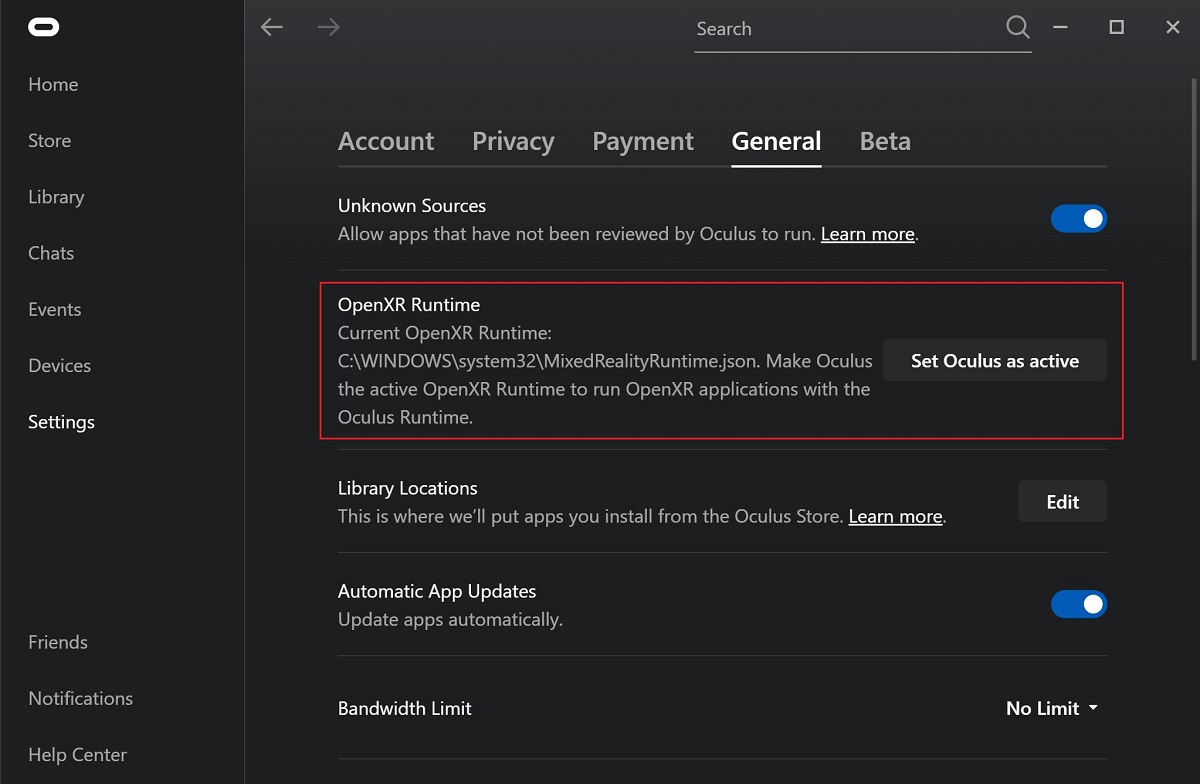
Set Oculus as the active OpenXR runtime via the General tab in the Oculus App Settings.
-
Plug in your headset using a data link cable, and choose to Enable Quest Link.
-
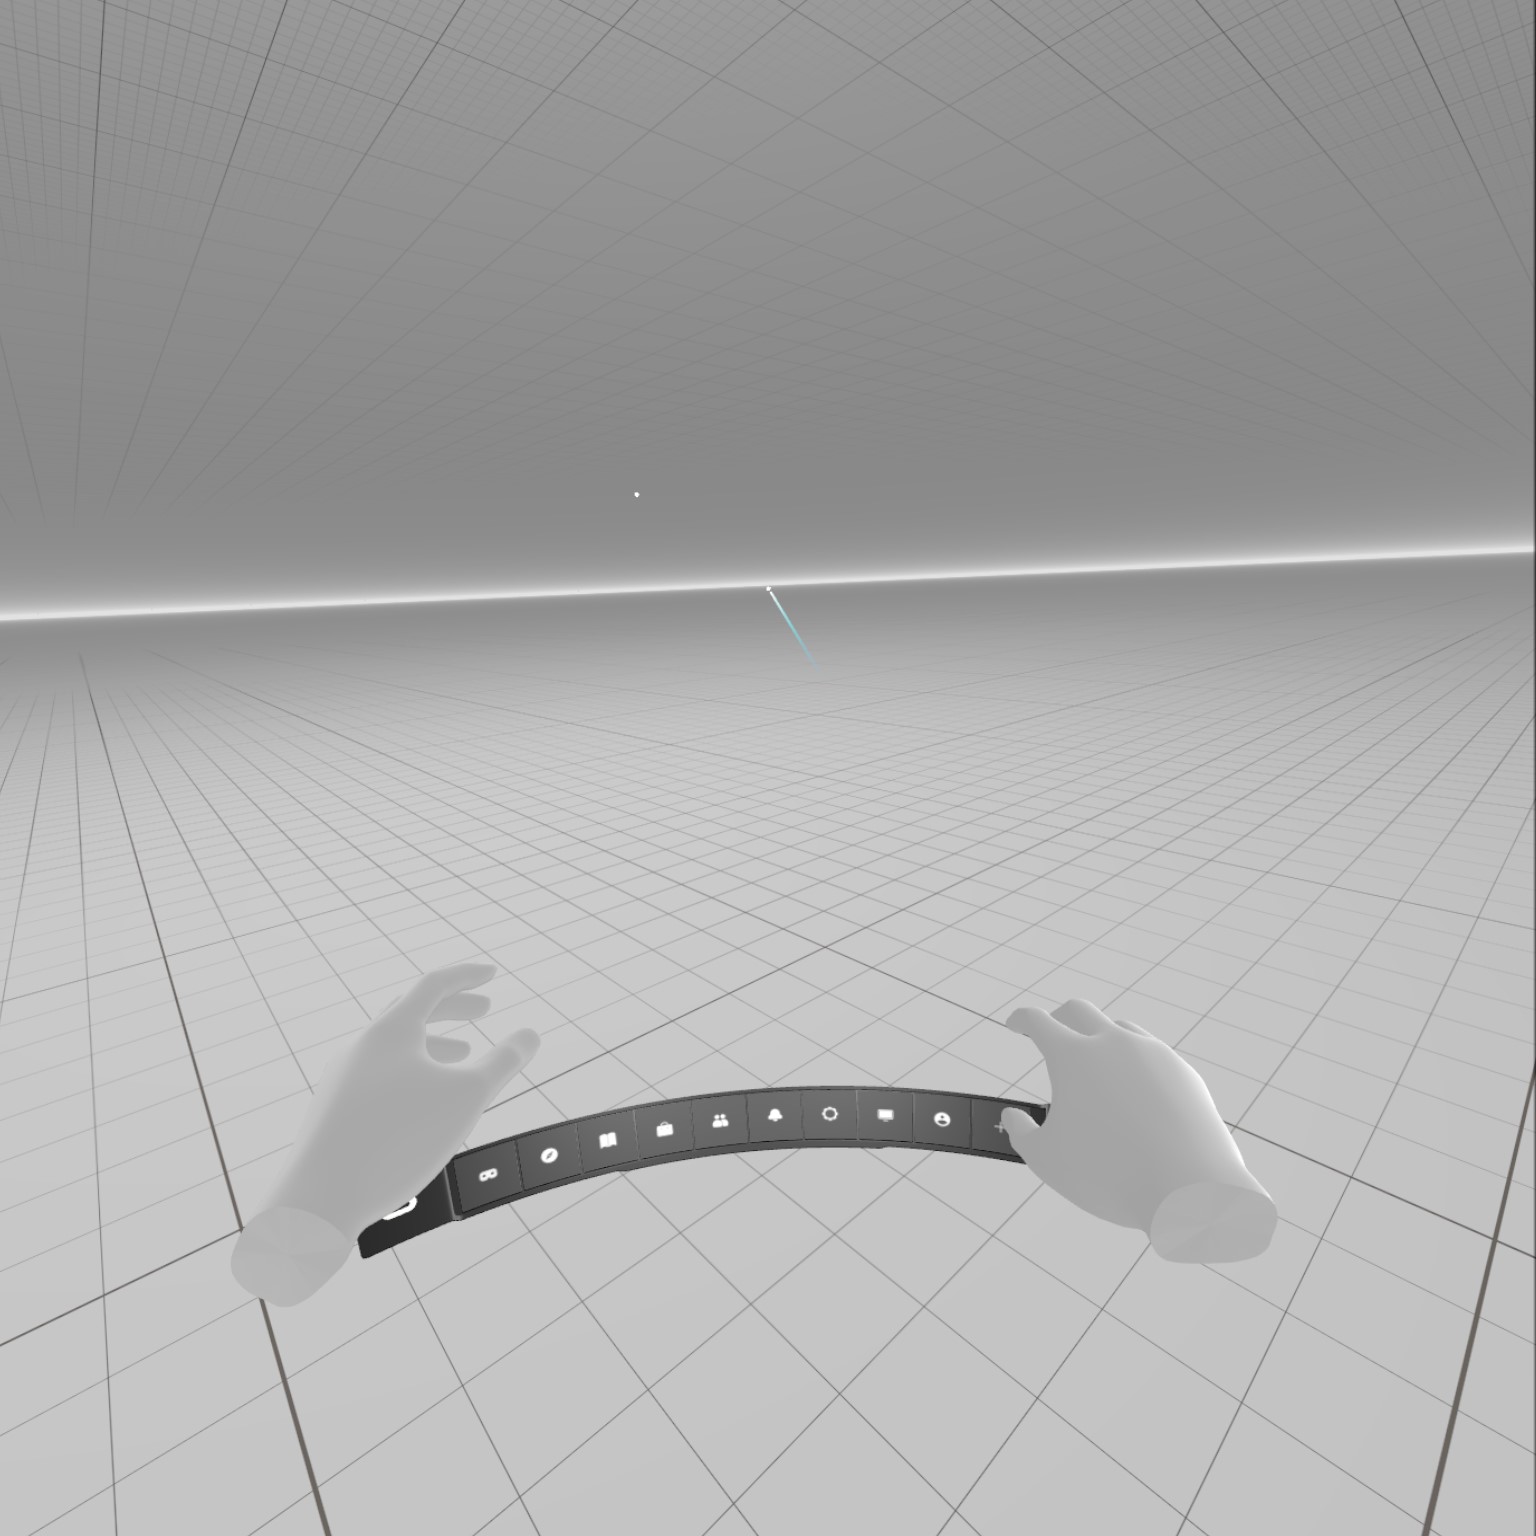
You’re in the Quest Link space when you see a blank world like the one below. All that’s here is a void VR space, and a menu at the bottom.
Part 2 - See your Blender World in VR
-
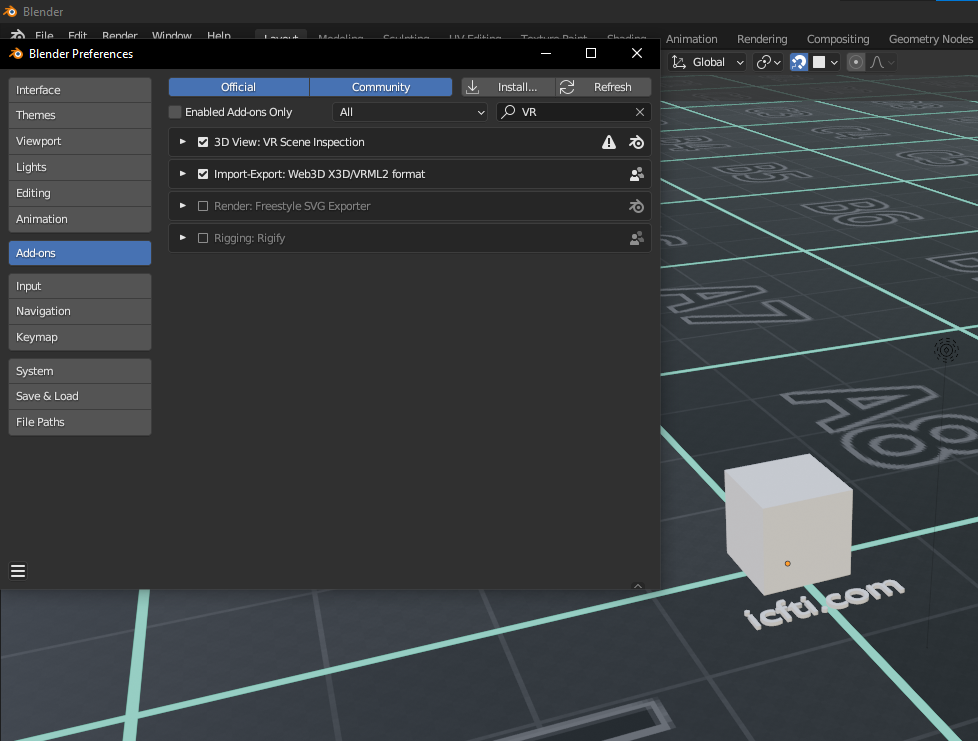
Take off the headset. Back at your PC, enable the VR Scene Inspection add-on in Blender.
-
You could start it now, but instead I recommend creating a new window. This new window will be a minimalist window without all the toolbars.
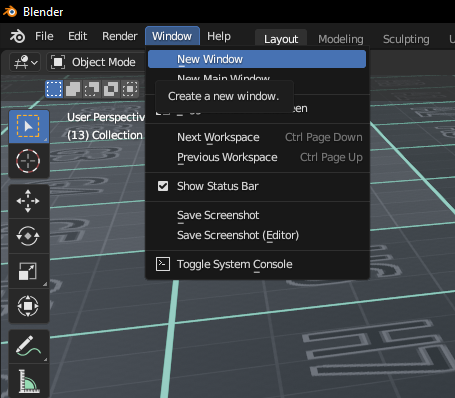
-
It’s important to understand that the VR Scene will show the same type of preview as the window in which the Scene Inspection addon is started. So first we opened a new window, and choose our preview type (we chose Render Preview with Eevee).
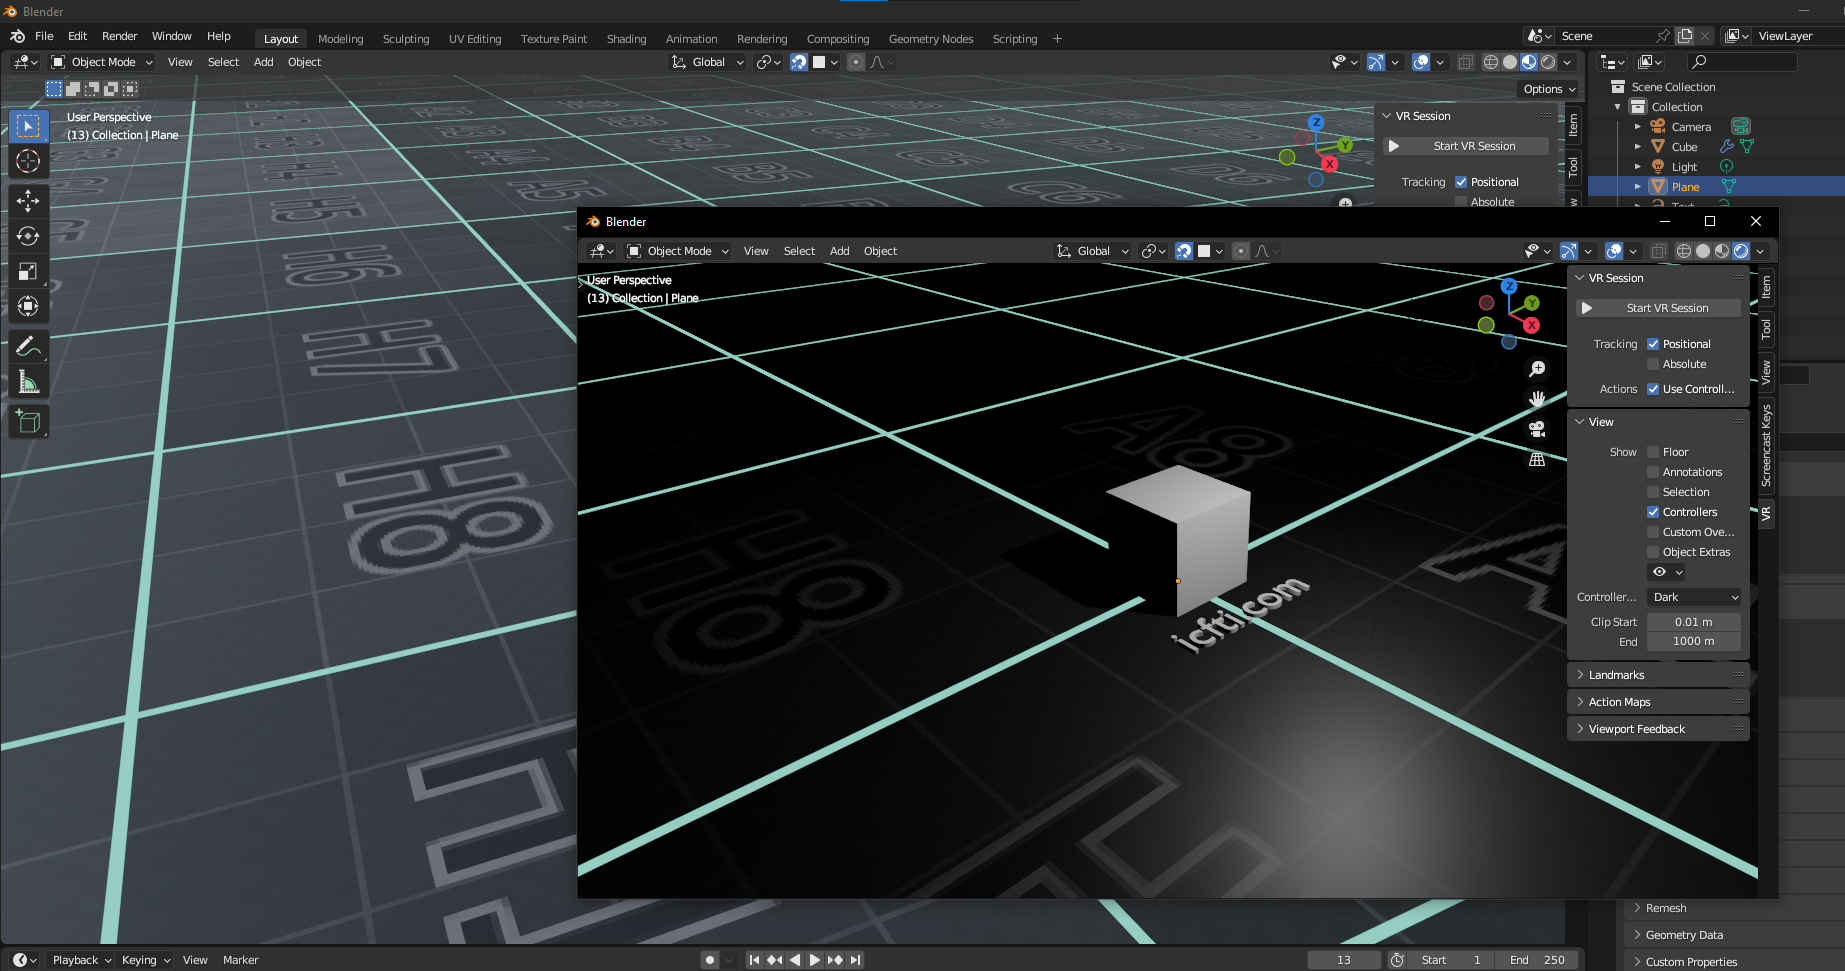
This way, we still have our main window with all our toolbars. Render Preview will continue to be shown in VR, regardless of what we change our workspace viewport to.
-
From within the new window,
Start VR Sessionusing the new VR side menu.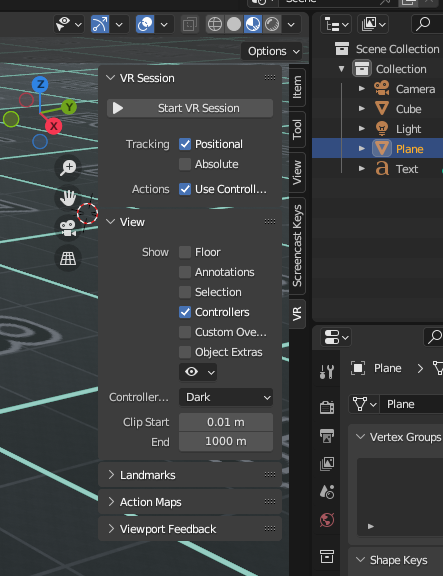
-
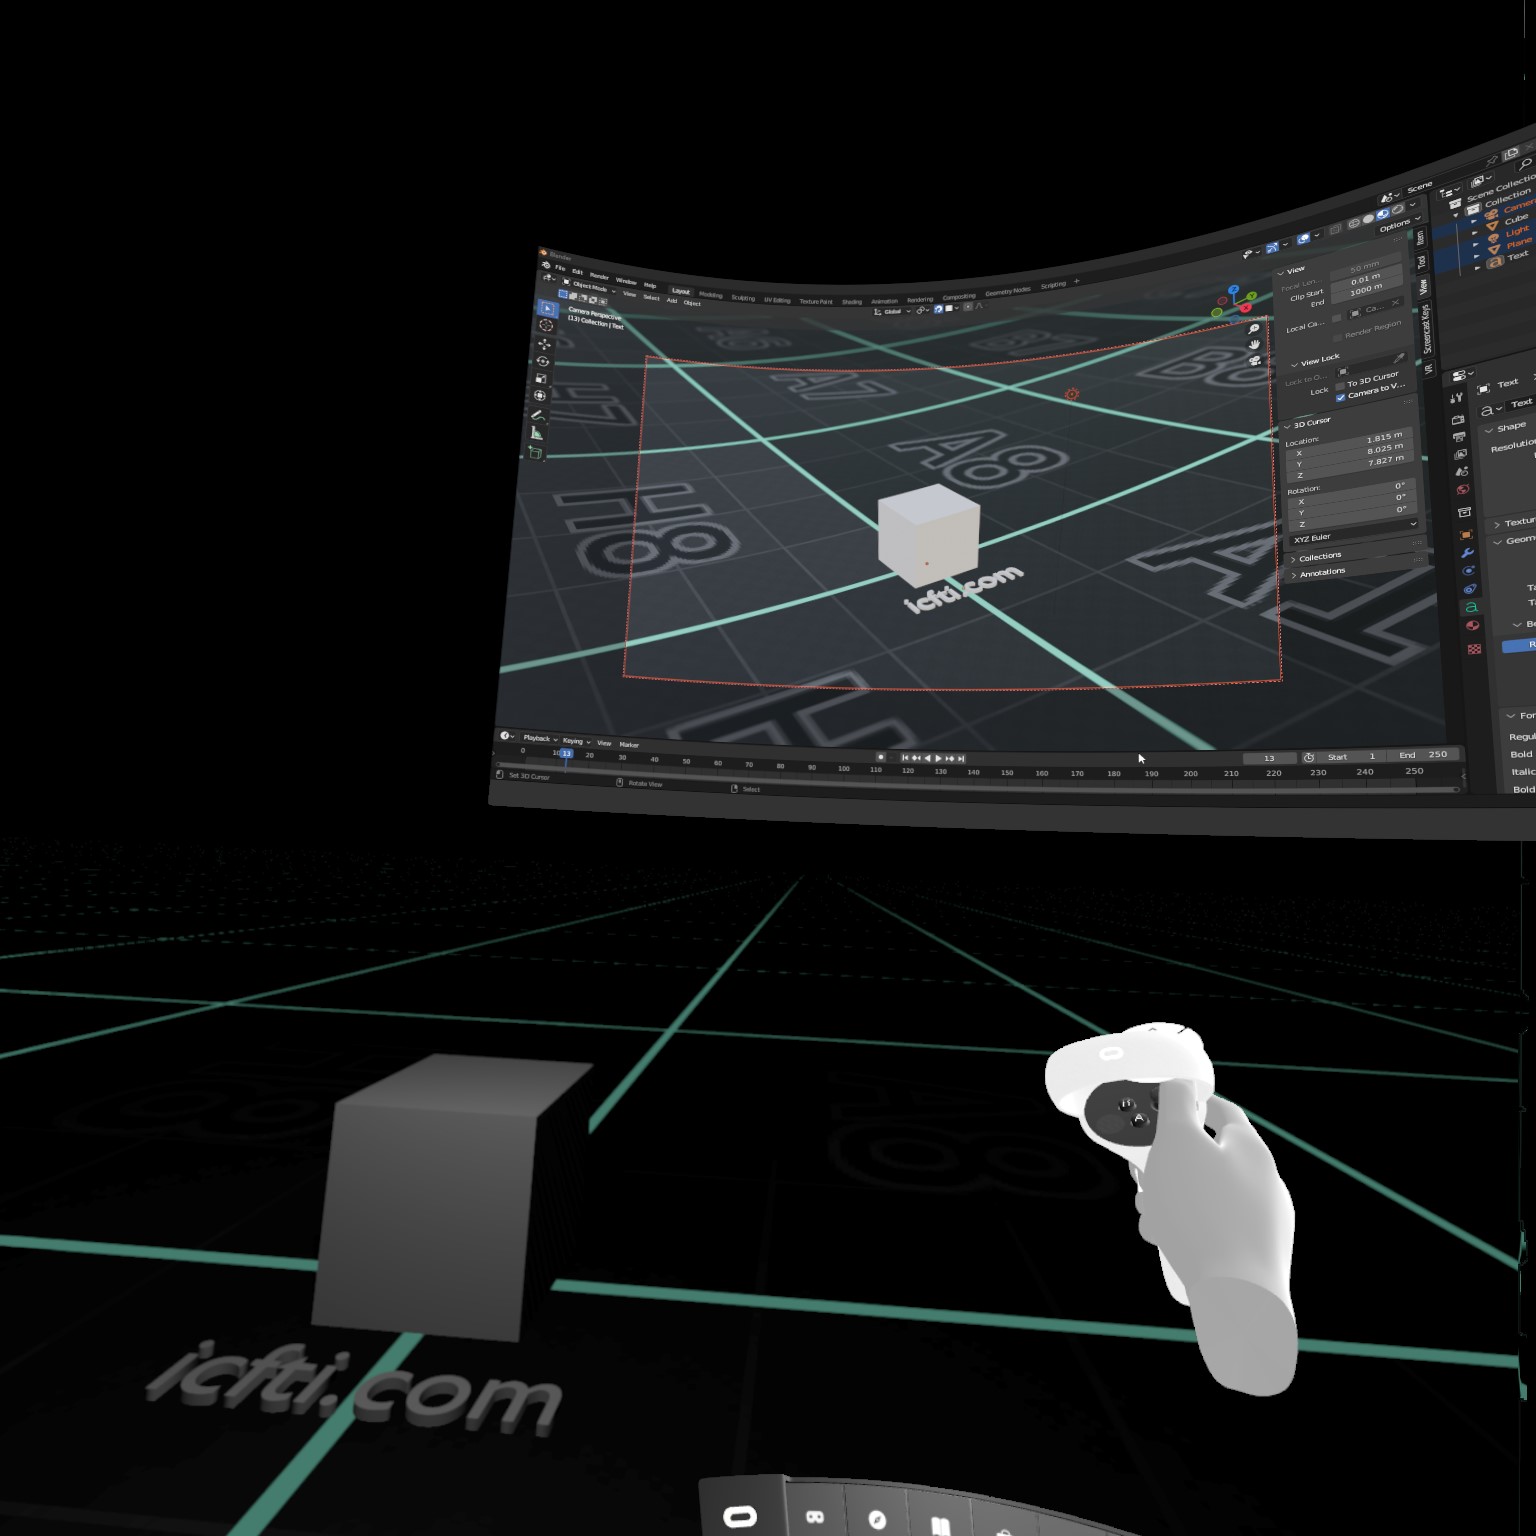
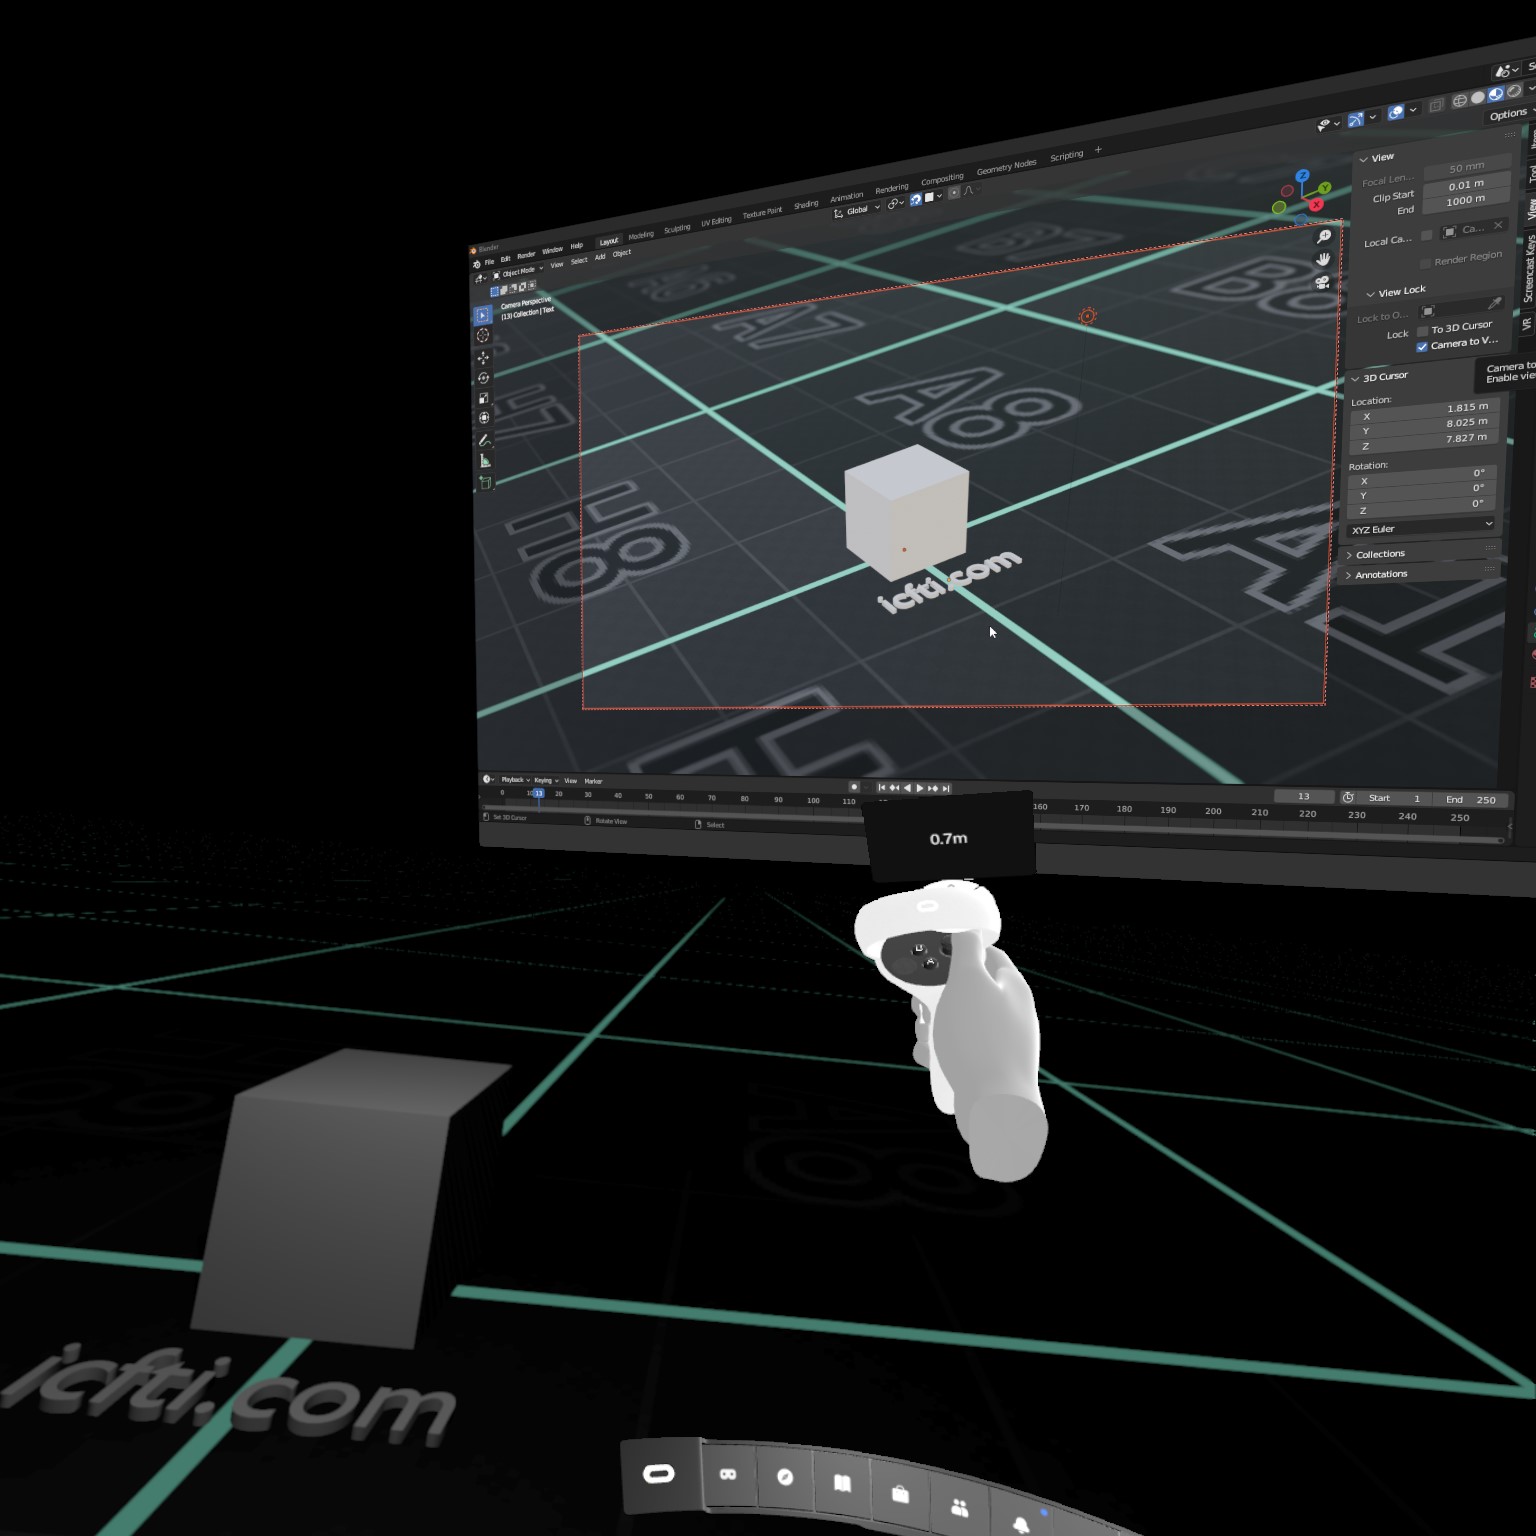
Put your VR headset back on, and verify you’re no longer in the VR void. This is Blender VR Scene Inspection. You can move around the object or world, zoom in and out, up and down, but can’t edit or move or edit any objects yet. Read on for instructions on how to manipulate this space.
Part 3 - Enable usable Blender Window in VR space
- Open the menu by pressing the Oculus button on the right-hand controller.
-
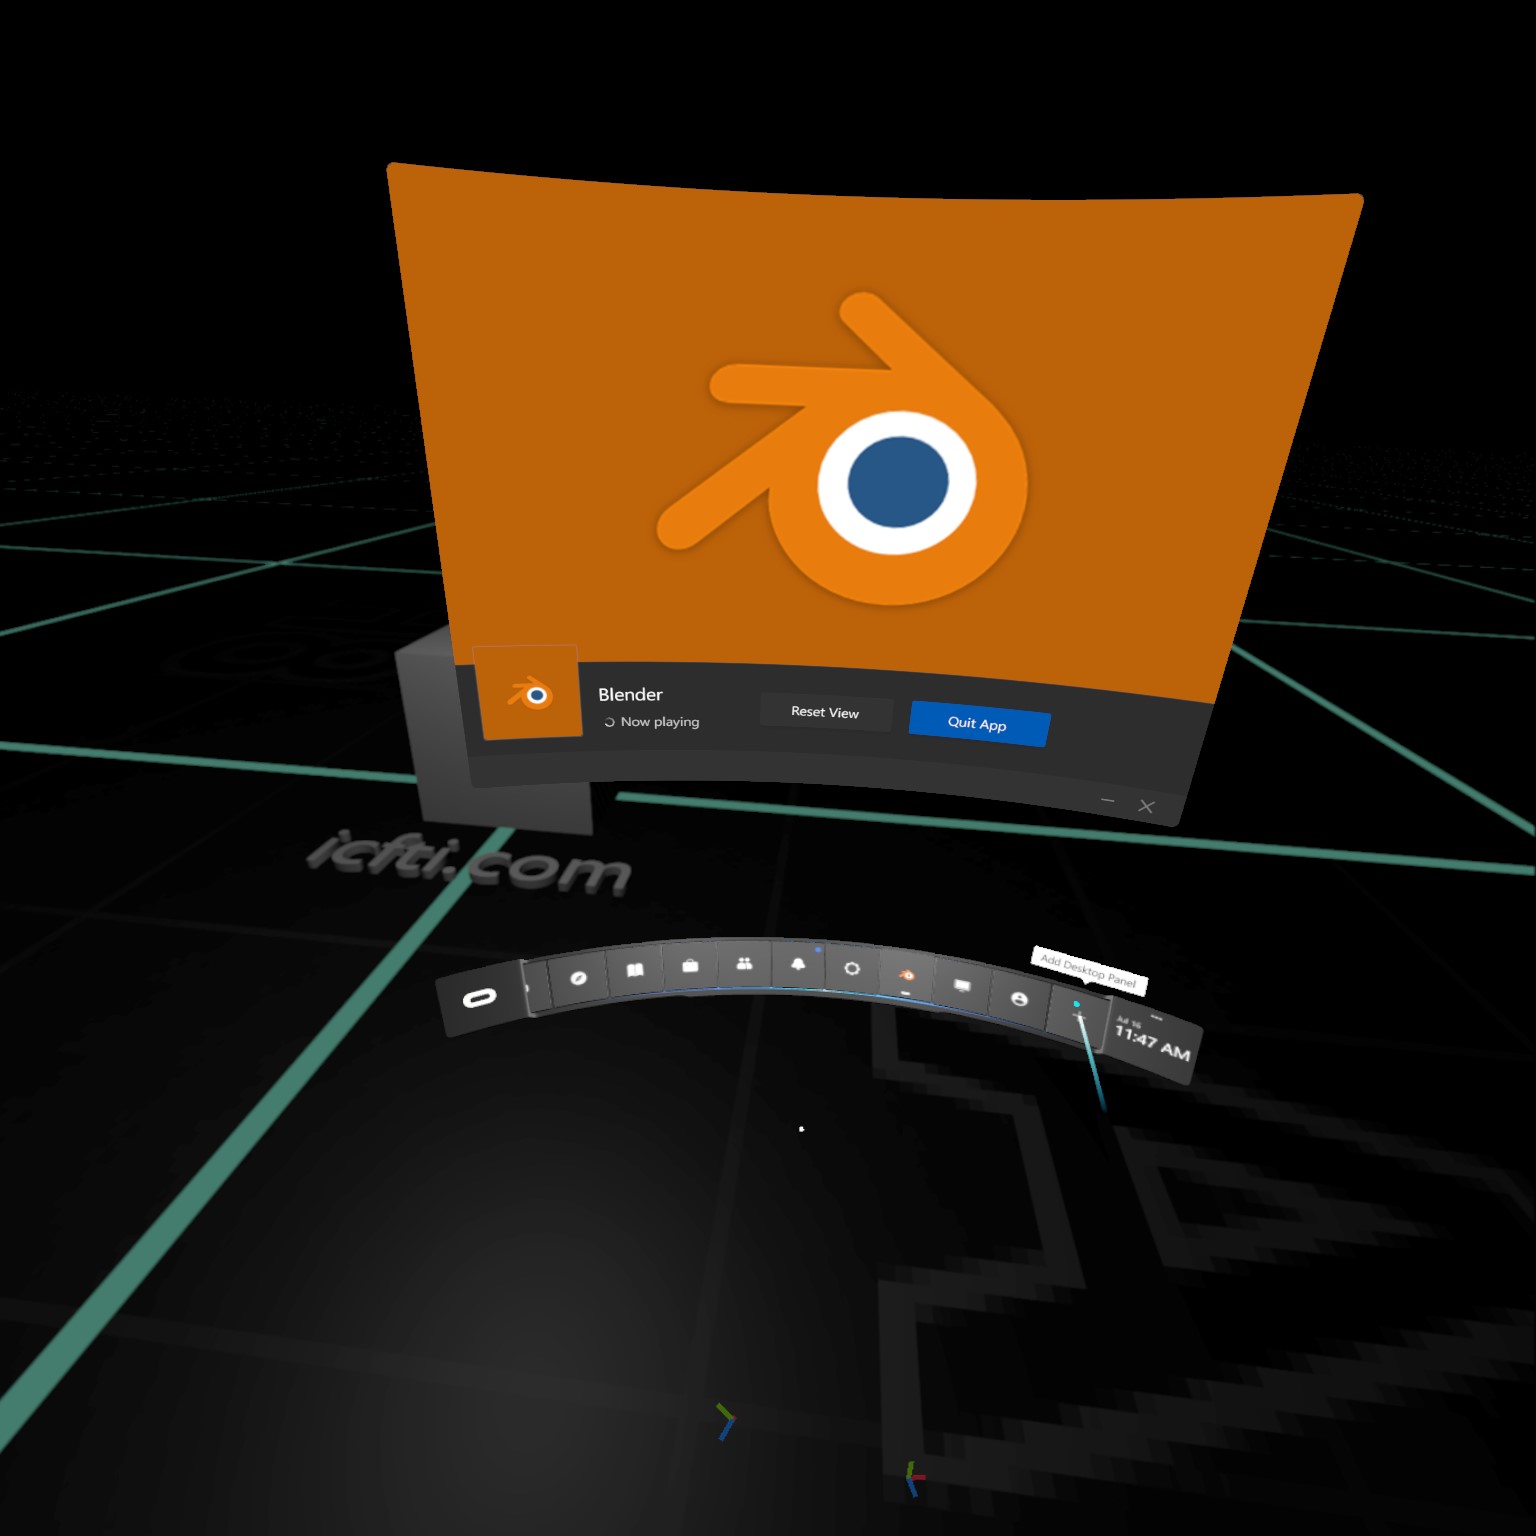
Press the Add Desktop button at the right end of the Oculus Link menu.
-
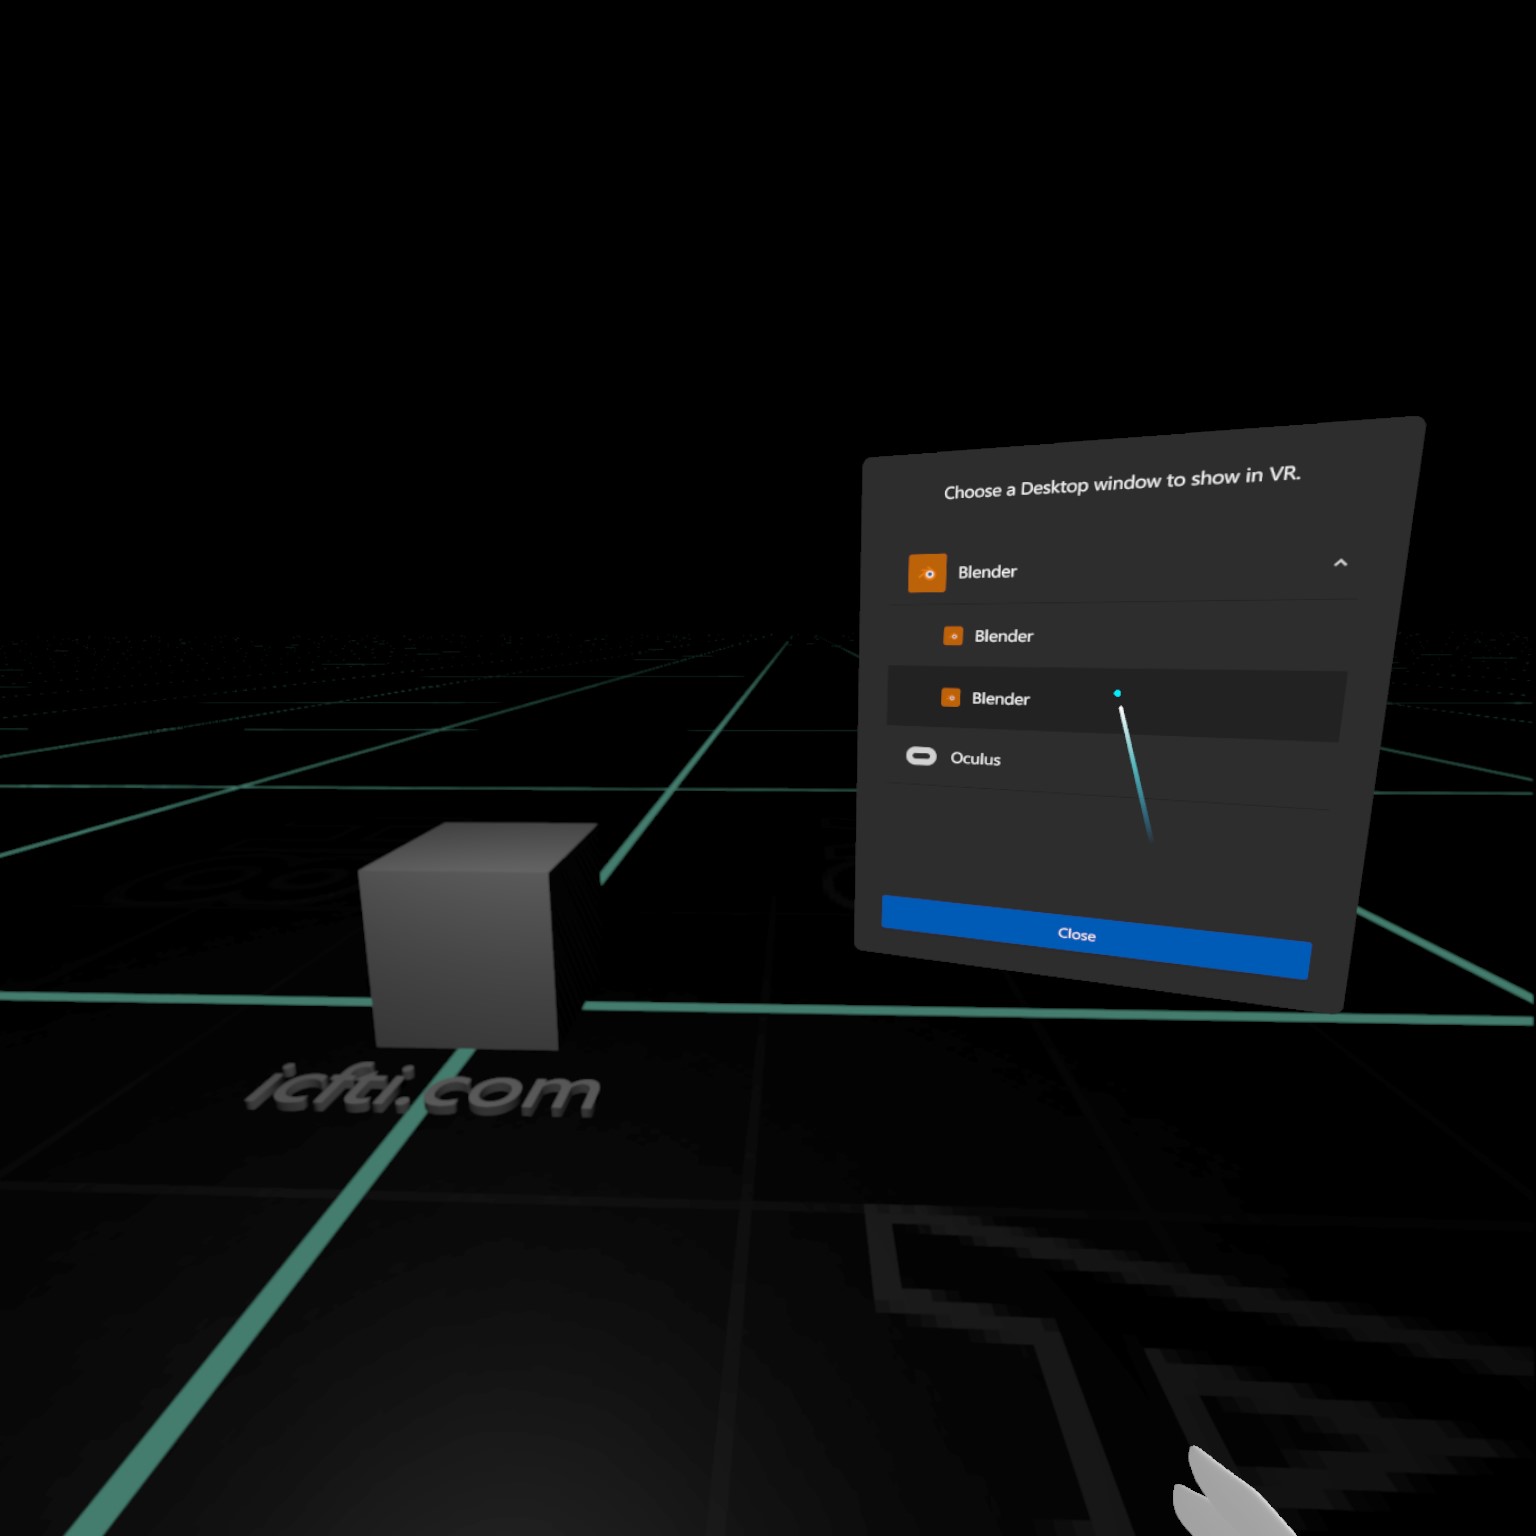
Notice the down arrow next to Blender. This means there are multiple windows to choose from. Go ahead and click it to reveal the windows.
-
The first instance is the Blender VR Scene Inspection that we can already see. The second is the Blender window running on our PC, click that.
-
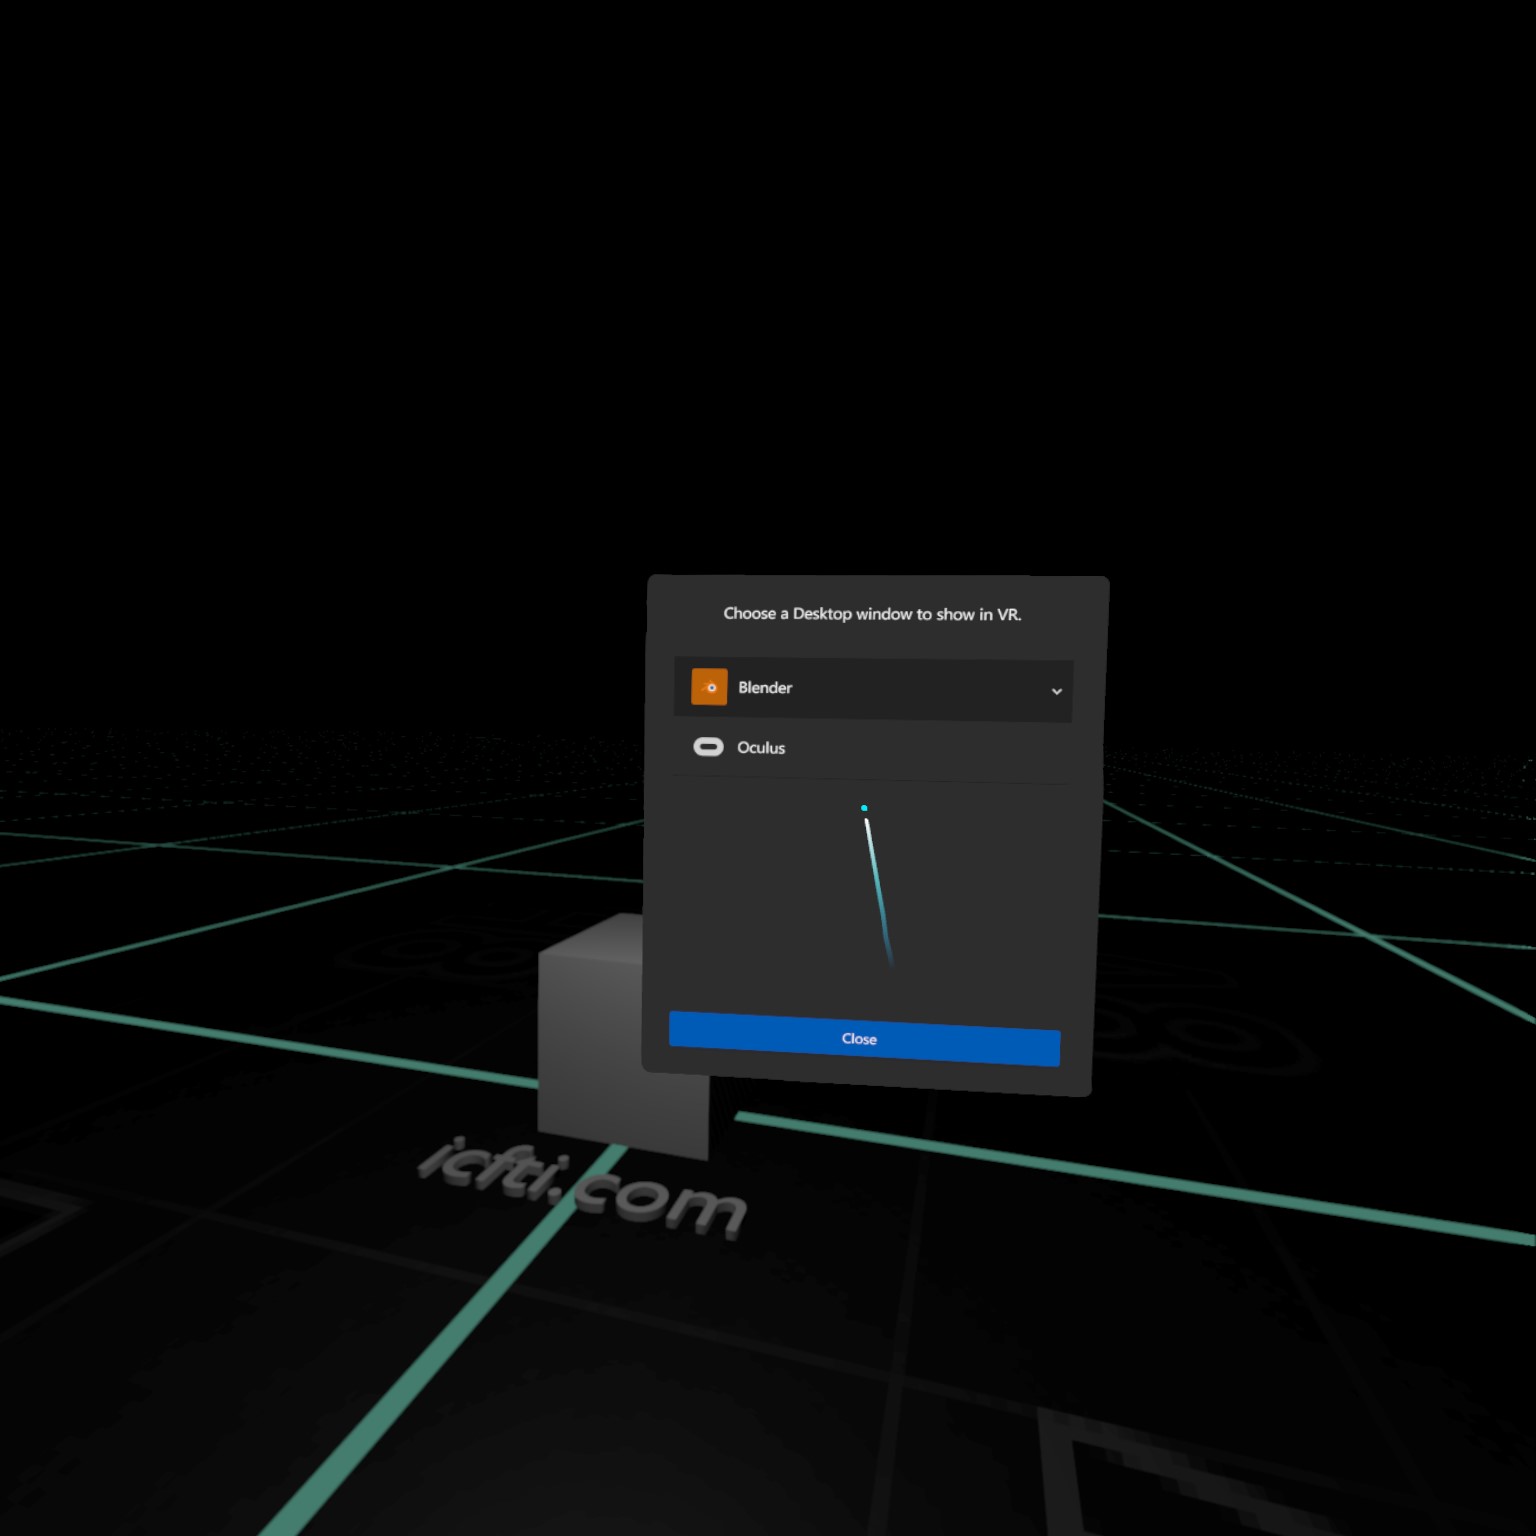
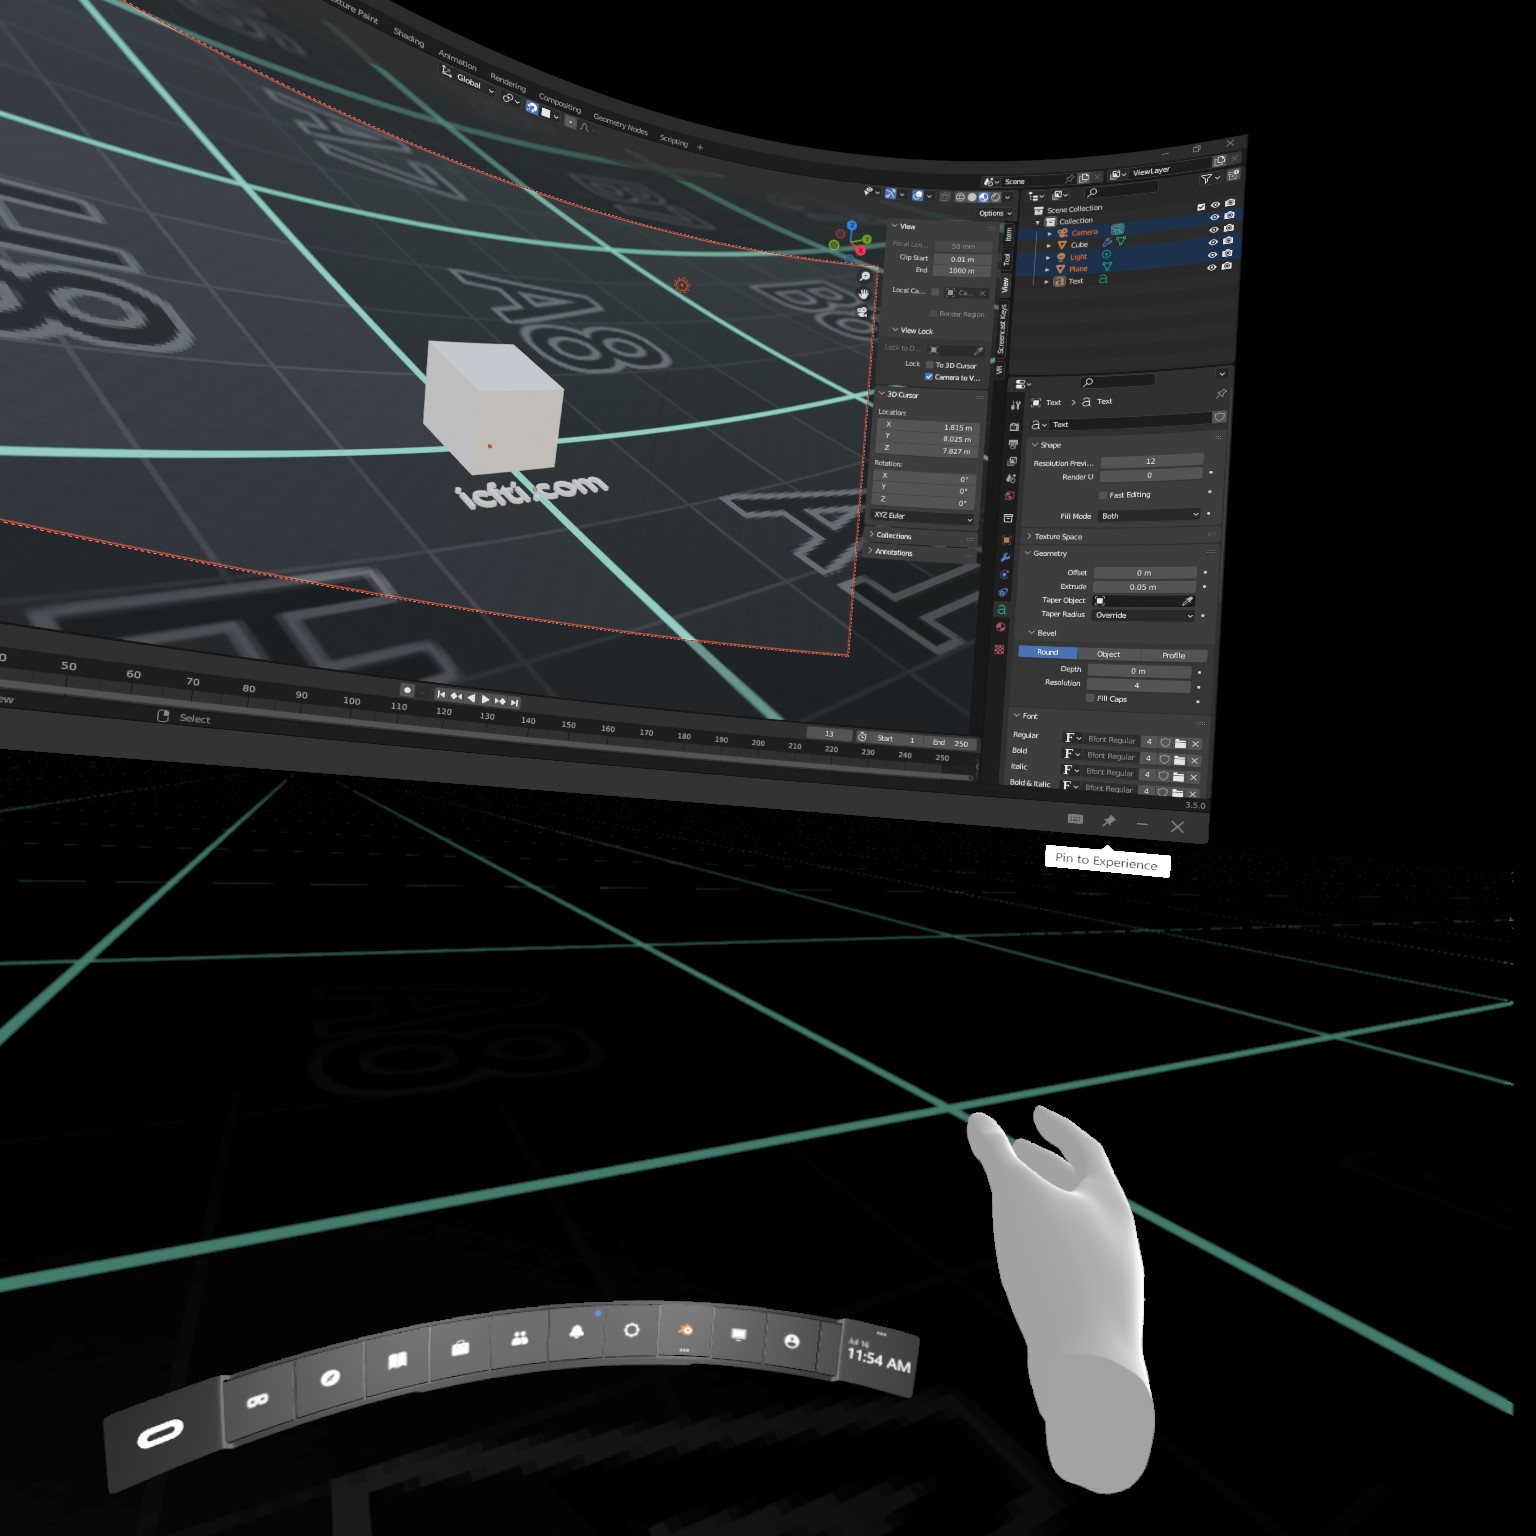
The Blender window running on your desktop should appear.

-
You can grab the window and move it wherever you like, including closer or farther away. Make sure you can still see the important elements of your scene.
-
Pin the window using the button at the lower right. This allows you to work while viewing. If you don’t pin, the window will disappear once you exit the menu. You can still move this window after pinning it, by opening the menu again.
-
Exit the menu. As you navigate the VR space, your window will stay in place. You’re now free to work in Blender. To do so, use the mouse and keyboard on your PC, as you normally would. If you need to look at the keyboard, look down the gap in the headset around your nose.
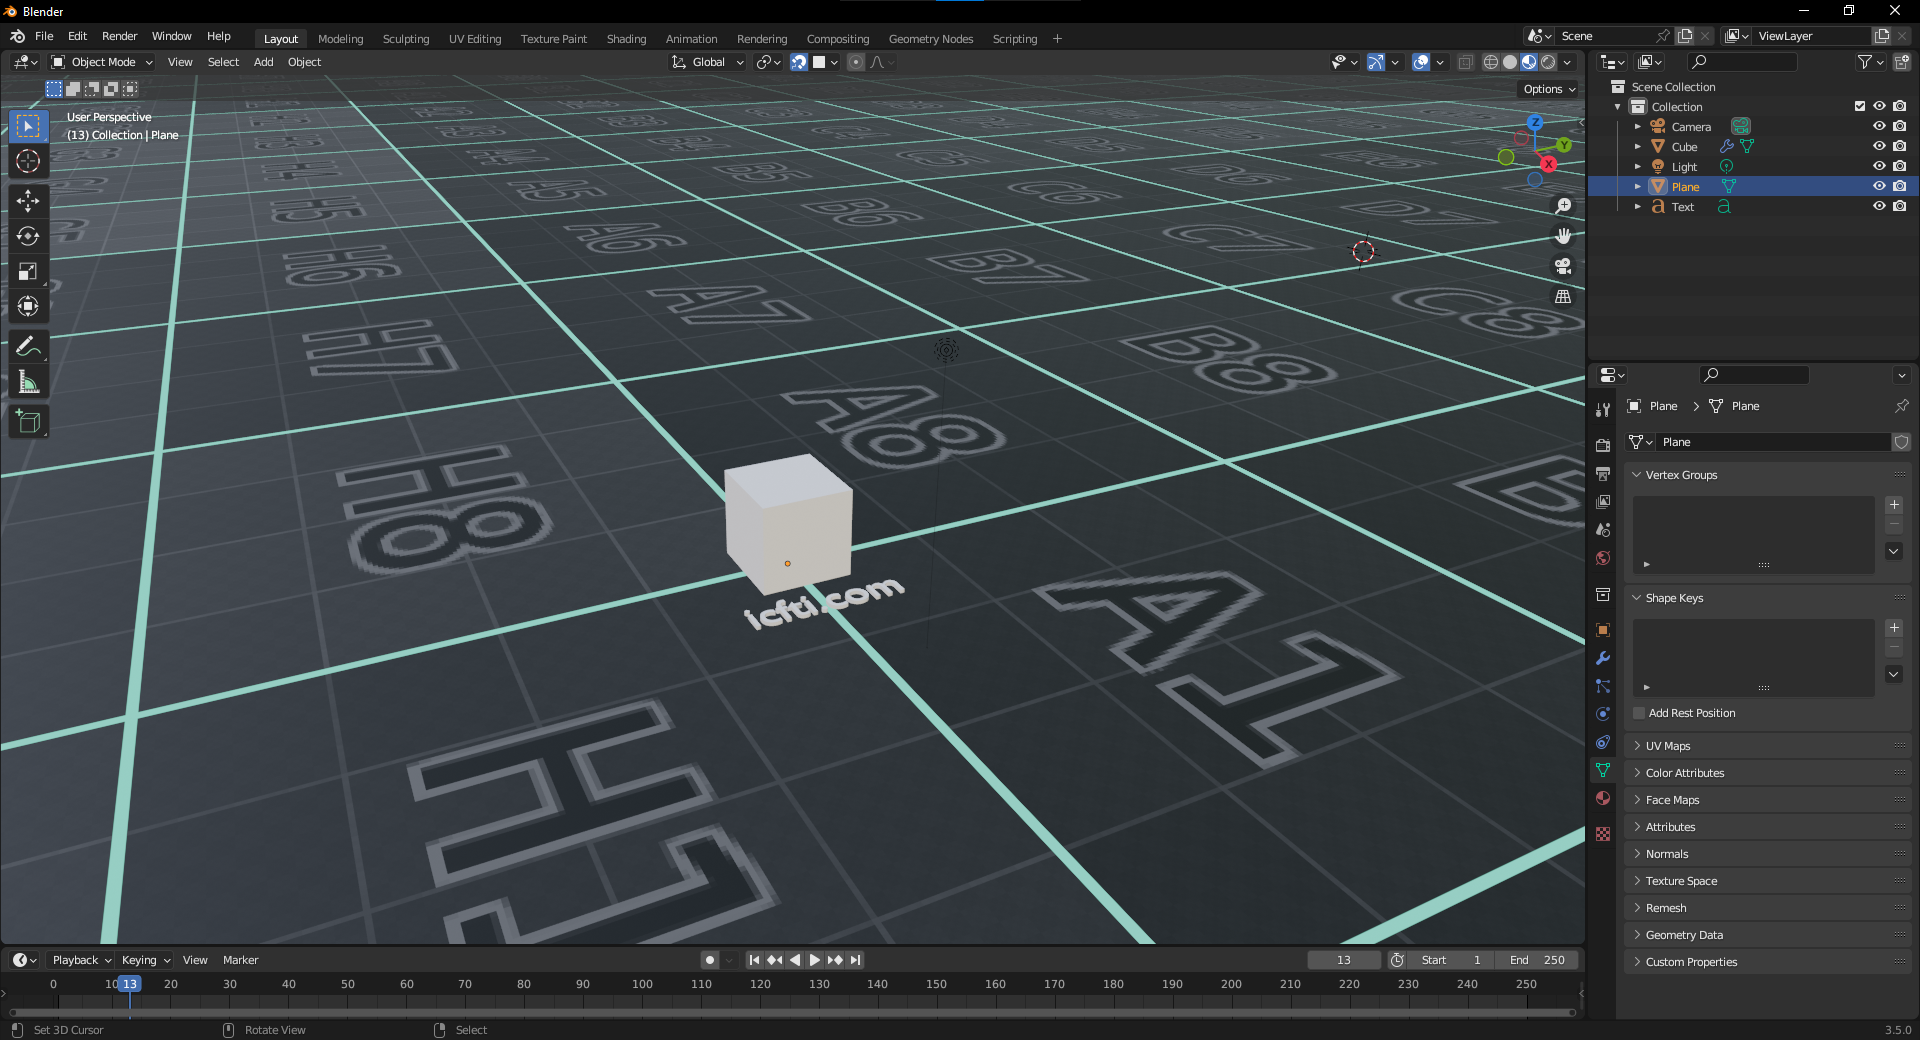
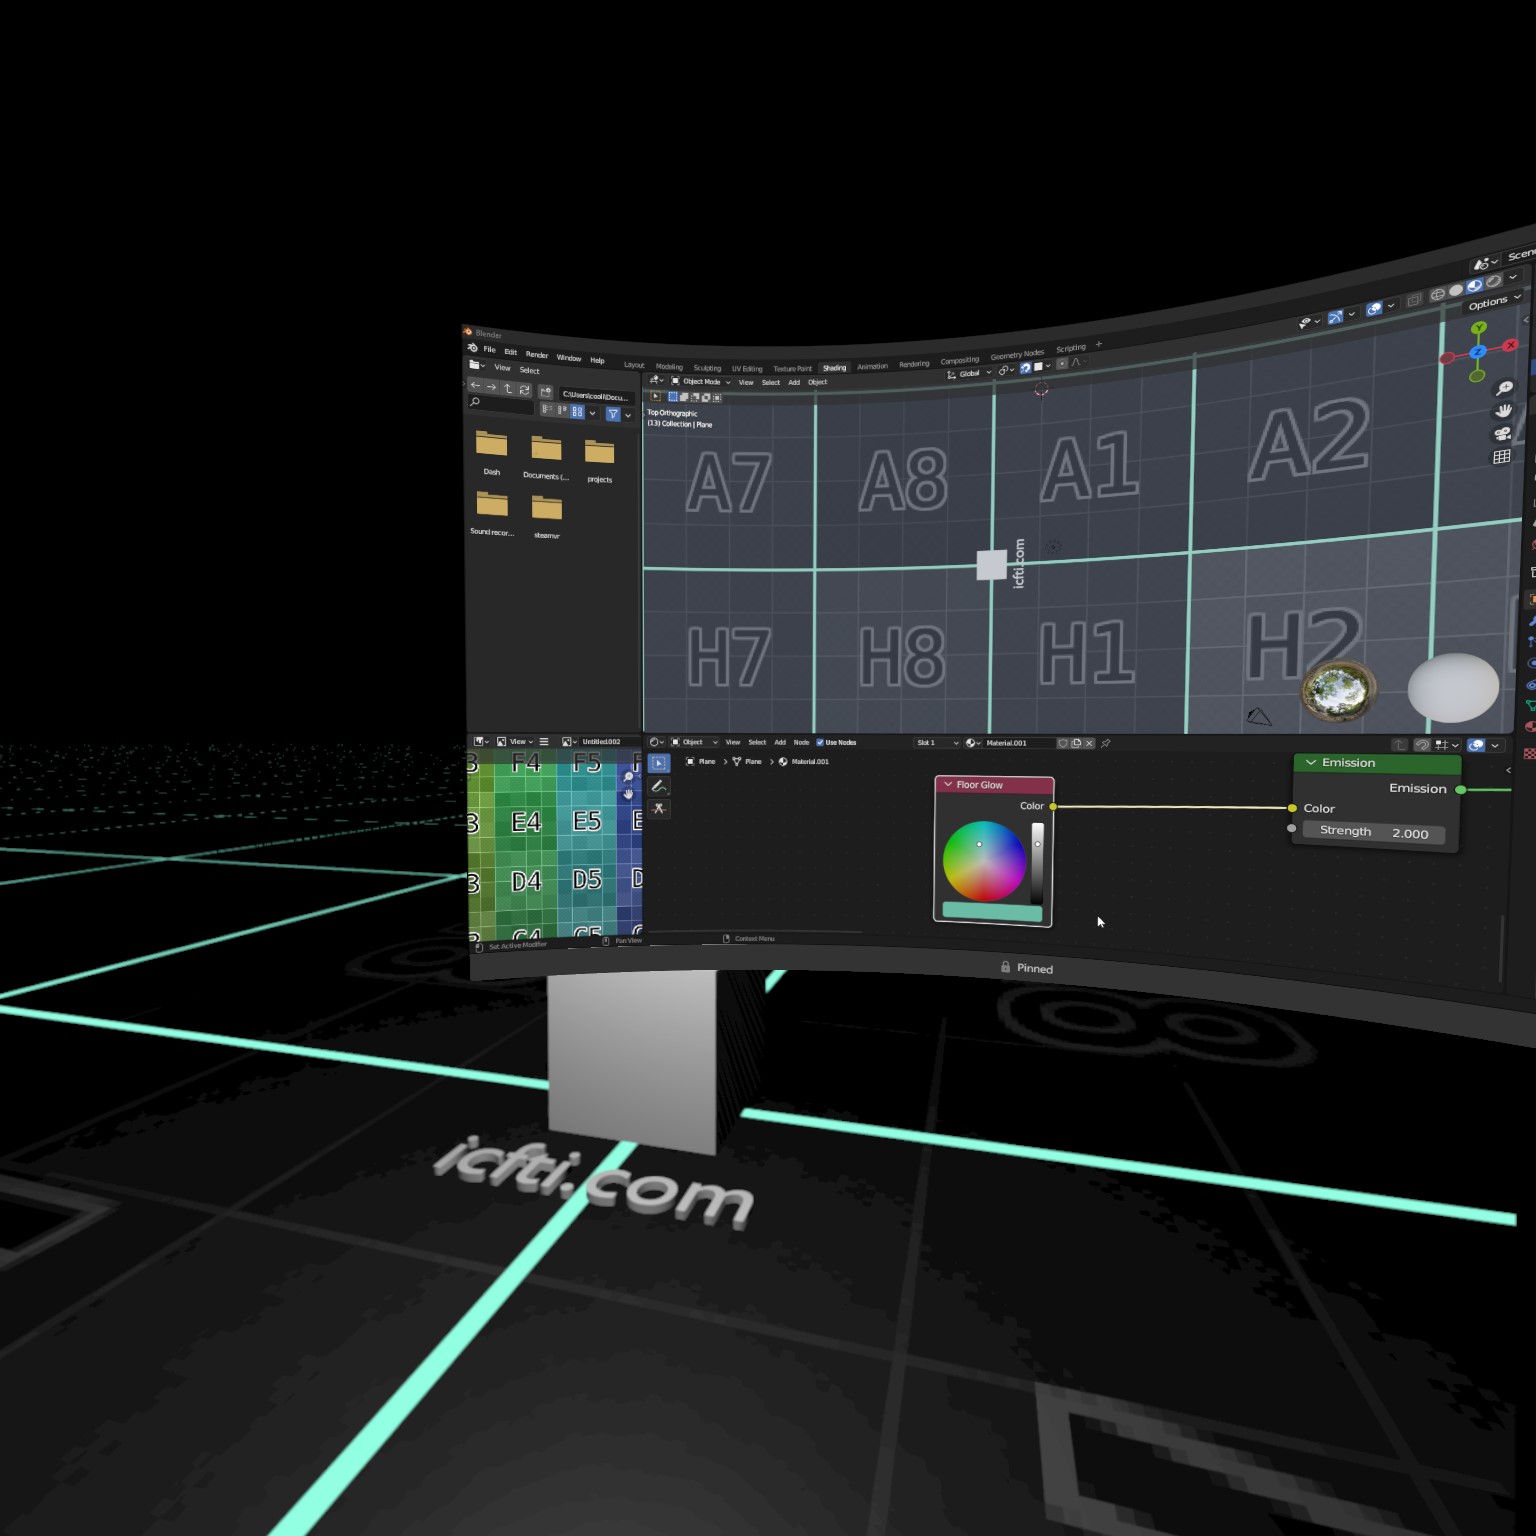
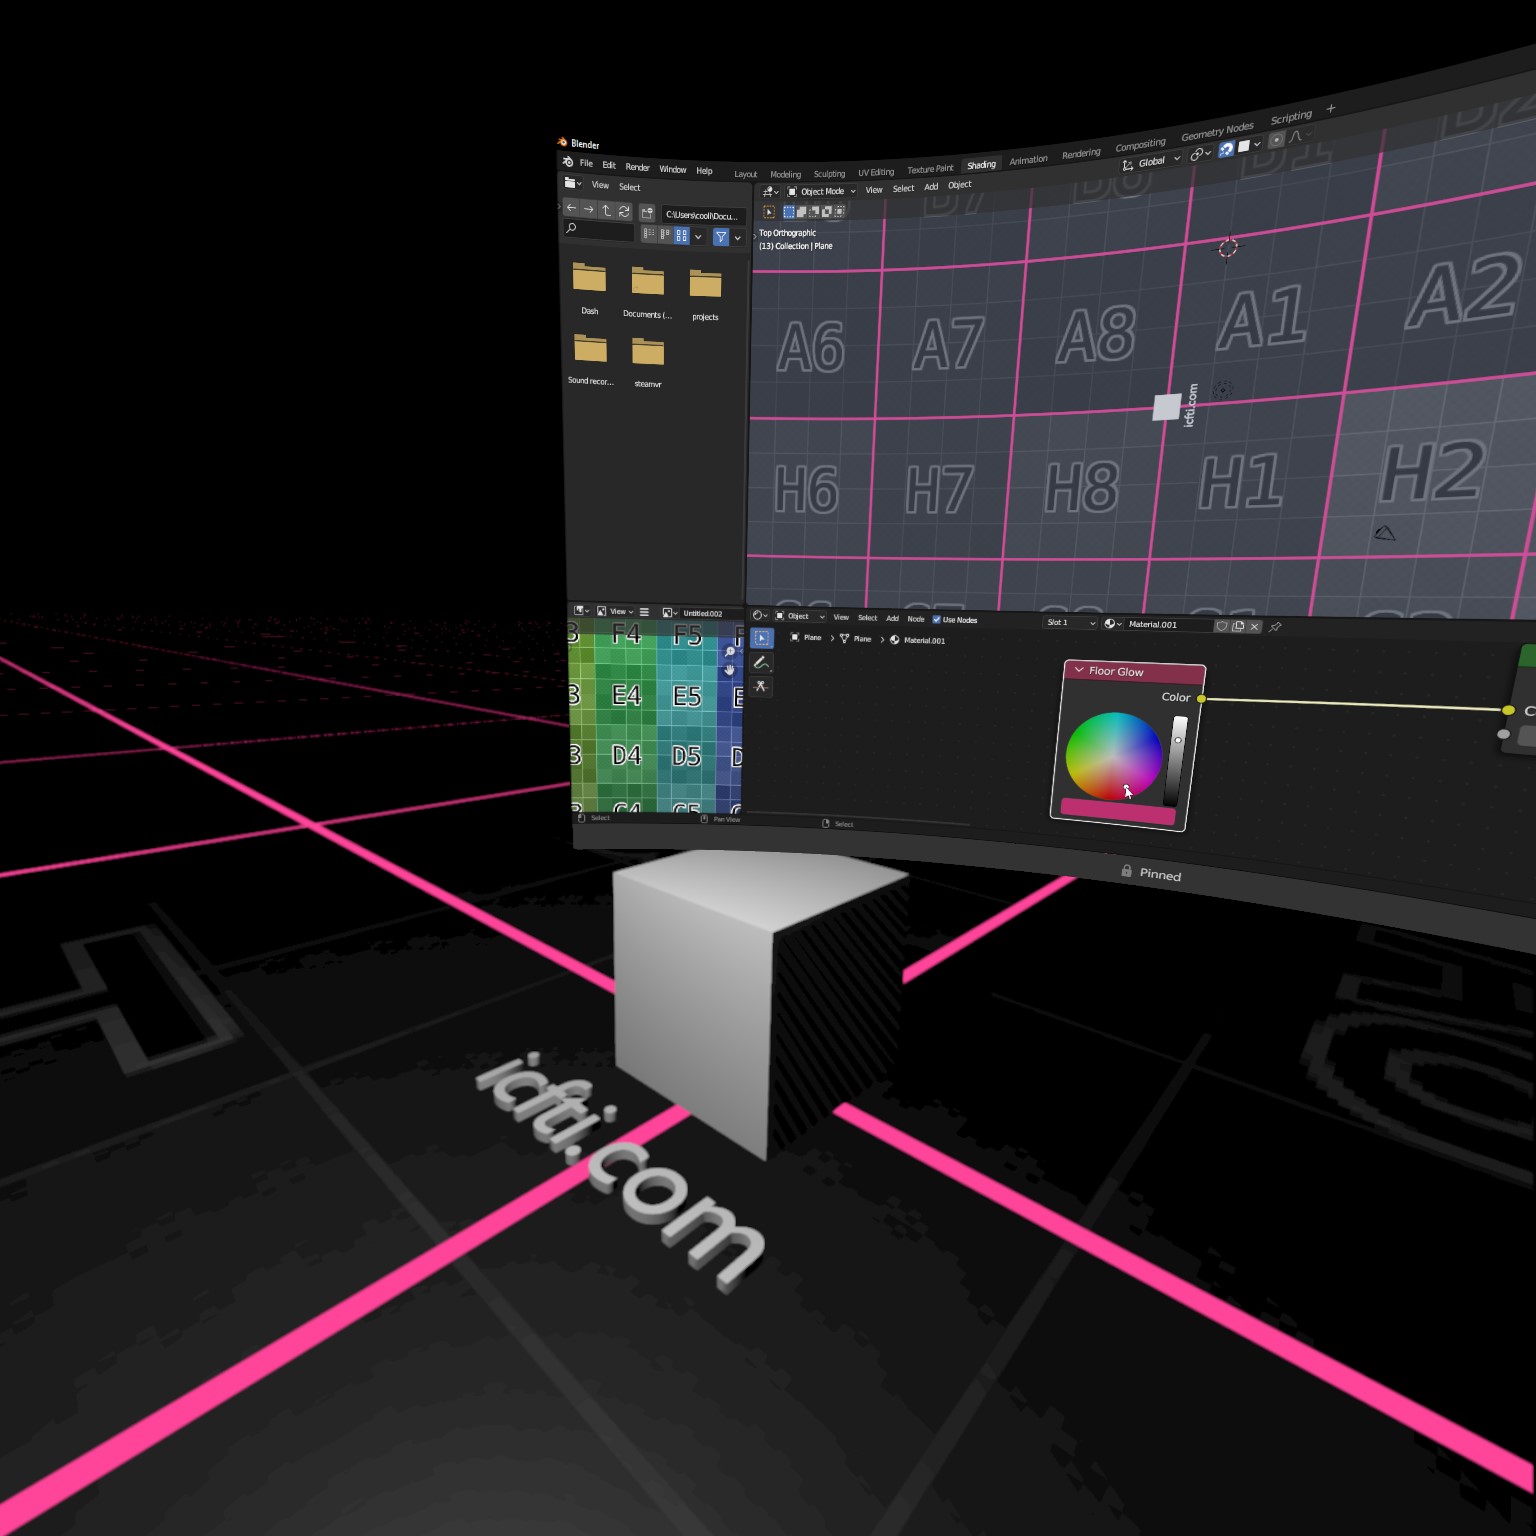
While using the mouse and keyboard, I can see the window that appears on my desktop. Let’s make a change in the window and see how it affects the world.
-
Here you can see that I’ve changed the color of the material, which will also alter our VR space in real time.
- And that’s it! Now go forth and dream new magnificent creations.
Part 4 - Mirroring (Optional)
There’s one other handy feature of the Scene Inspector addon
that I want to mention.
With the mirroring feature, you can mirror what’s being seen in VR,
to the Blender window on the PC.
You can find this feature
in the Viewport Feedback section
of the VR side menu.
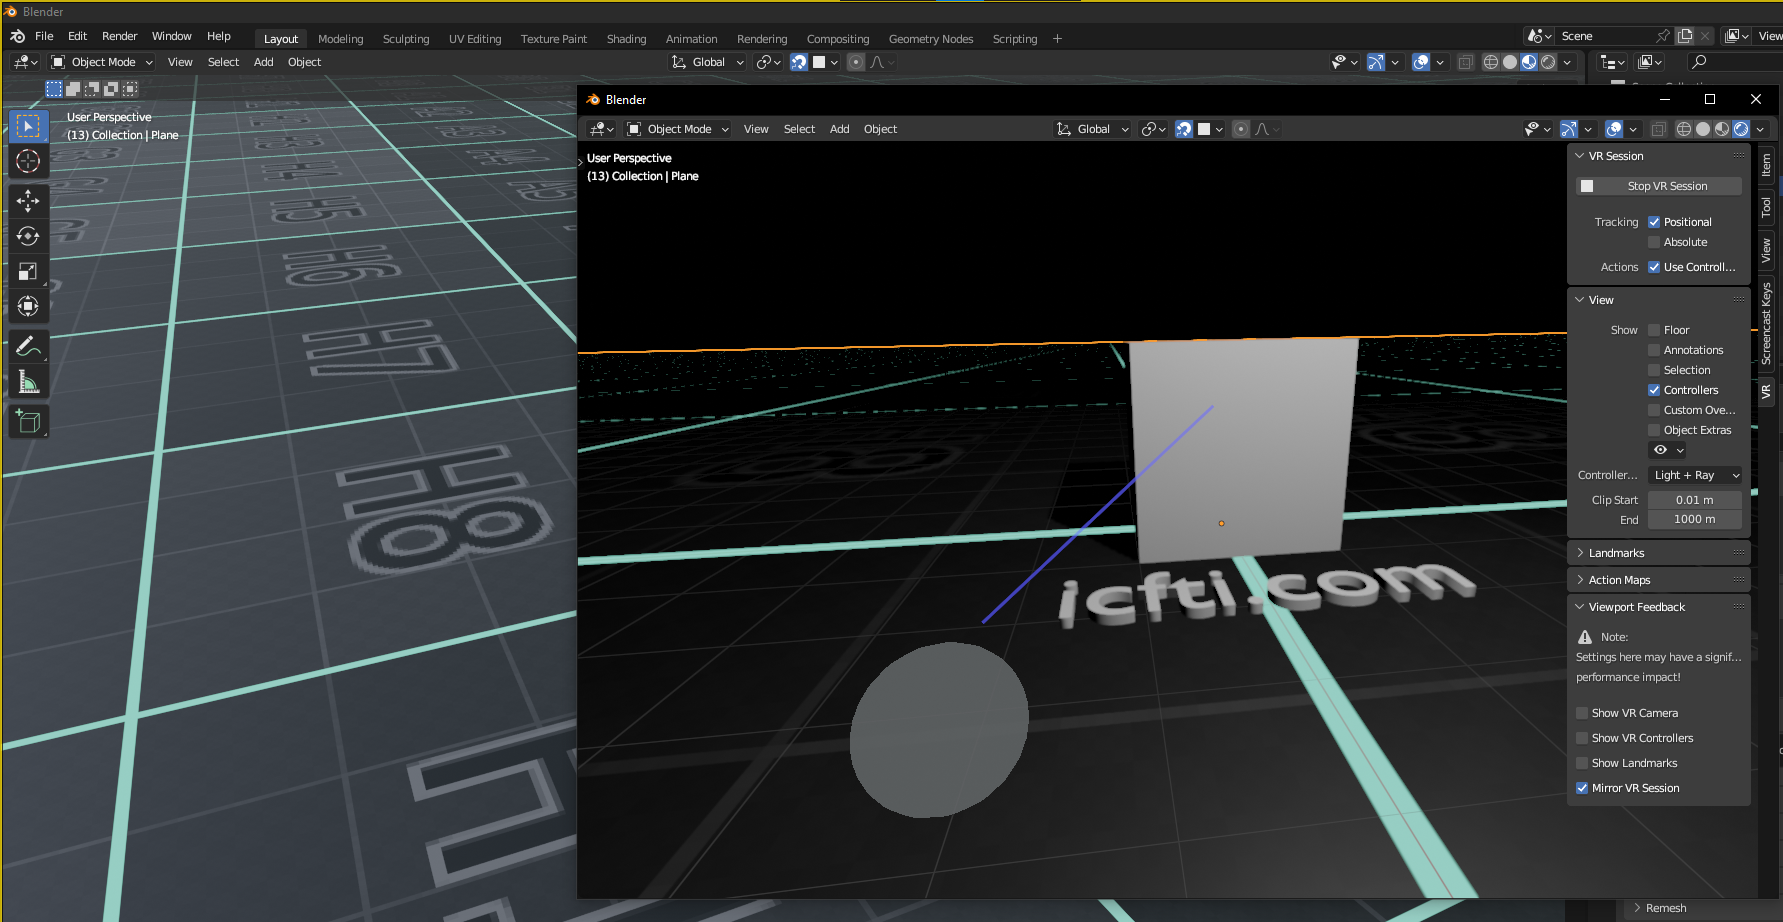
Now as you move around or turn your head in the VR scene, the window will be updated to show what you’re seeing.
This is useful if you have someone else in the room with you, who wants to see on the PC, what you’re seeing in the headset. For recording/streaming, the resolution will also be higher on your PC, rather than trying to record directly from the headset.
Conclusion
We can’t yet grab vertices and move them around with the controllers, and instead must use a virtual copy of the Blender window. However, this method allows you to modify your virtual world, while experiencing it in VR.
By the way, here is the final Eevee render, just in case you were curious.