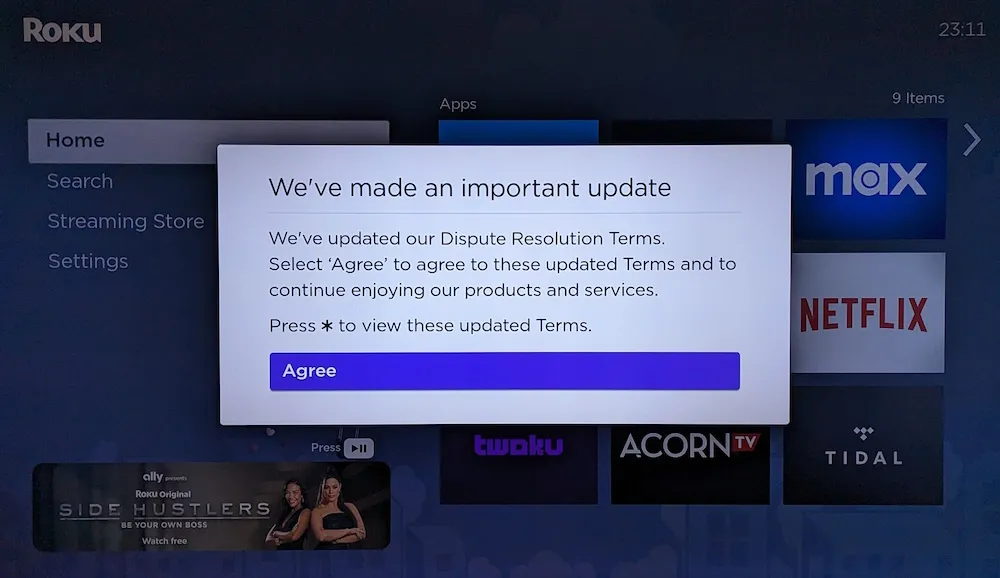
Roku has been getting a lot of criticism lately because of some recent drama. First, they exposed many users’ accounts to hackers, who proceeded to make purchases with their credit card info. Then, Roku doubled down on their blunder by requiring all users to agree to an arbitration agreement. Essentially, the goal is for Roku to protect themselves from getting sued by users who lost money from the company’s negligence.
The problem is, users only have the option to agree or…. nothing. That’s the only choice. If you don’t agree, Roku completely locks you out of the TV that you should already own. And it’s not just limited to the smart apps, You can’t even access any of the setting menus, or use HDMI-connected devices!
Fortunately, we’ve discovered a way to bypass the Roku forced agreement, and regain access to your TV again. It is critical to perform these actions ASAP. It currently works, and will continue to work once enabled. However, if you wait, an update may be released from Roku, which prevents using the bypass if not already enabled.
The three main steps in this process are to completely power off your Roku TV, disconnect it from the internet, and permanently block it from reaching the Roku servers. The main idea of the solution is to cut off the internet from your TV. If the Roku TV can’t reach Roku’s servers, it can’t display the agreement message. Even if you select “Agree”, that agreement will never actually make it back to Roku.
1. Completely Power Off Your Roku TV(s)
First, turn off and unplug your TV. This will prevent Roku from pushing any additional updates to your TV, that might render it even more unusable.
Just pressing the power button doesn’t work, since some portion of information remains in memory even when you think the TV is off. We discovered that once the agreement message was displayed, it will stay in memory until the TV is FULLY powered off.
2. Disconnect From the Network
The easiest method is to unplug any LAN cables to your TV, and turn off your WiFi, or just unplug your router entirely, cutting you off from the internet. At this point you can plug the TV back in to the power outlet, and turn it back on. If all goes right, you should no longer see the message demanding your agreement.
3. Permanently Disable Roku’s Internet Connection
Great! You did it! You can now use your Roku TV as a dumb TV, and have full access to all the settings. But… now you have no internet to the rest of your devices. And if you re-enable the internet, the arbitration message will come back.
Now that we have access to the settings of the TV again,
the next step is to erase it’s WiFi connection details from
Settings > System > Advanced system settings > Network Connection reset.
For added protection, you can also completely block the TV’s MAC address. This is an identifier that is permanent and unique only to your TV, and distinguishes it from any other device on your network.
Your MAC address can be found at
Settings > System > About.
Next enter your router configuration
and set a static IP address for your Roku’s MAC.
We cannot give exact instructions for this,
as every router’s configuration method is different.
Once a static IP is set,
set up firewall rules to block the TV from accessing the internet.
After you’ve blocked only your Roku’s internet connection, you can re-enable the internet for the rest of your devices.
4. (Optional) Regain Access to Your Media Apps
Now that your Roku TV is a dumb TV, you may wonder how to watch your favorite streaming services and smart apps. Here are some options:
- Use HDMI to connect a device such as a laptop, Raspberry Pi, or other computer, and use it’s internet connection and web browser.
- Use HDMI to connect a video game console such as a Playstation 5, which has many of the same apps as Roku.
- Add another firewall rule that allows the Roku TV to access only a local Jellyfin or Plex server.
Conclusion
Because your Roku TV no longer has internet access, it acts more like a “dumb” TV, using only eternally connected media devices. The benefit of this, is that you’re not held hostage by Roku’s arbitration agreement.
]]>